
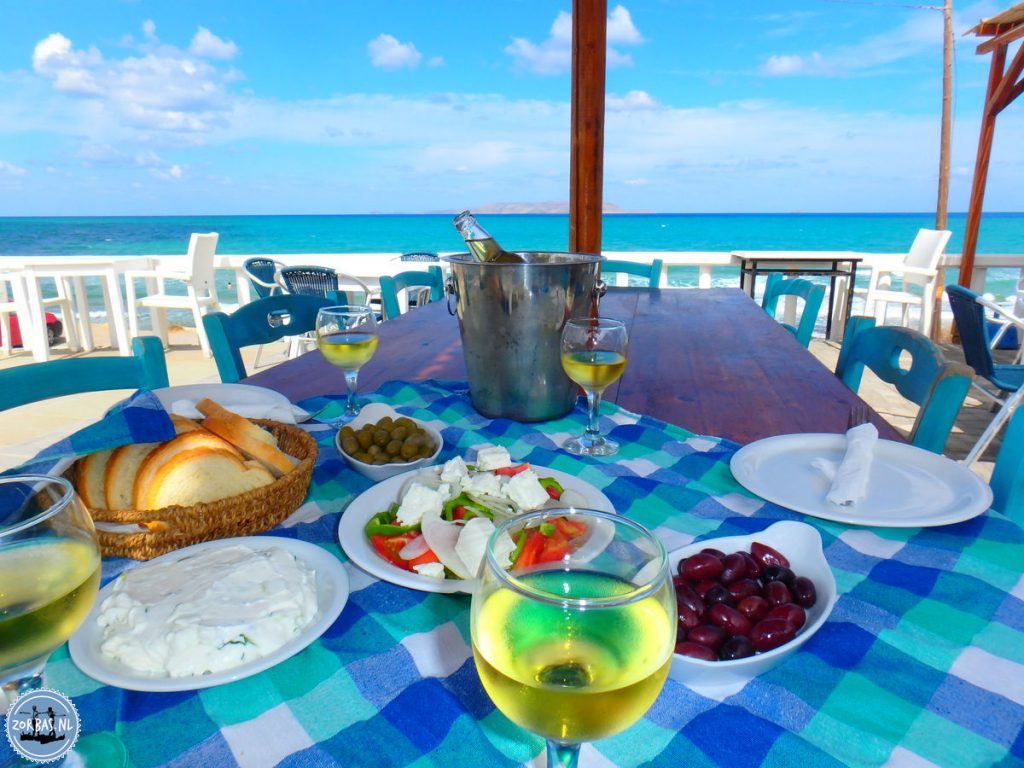
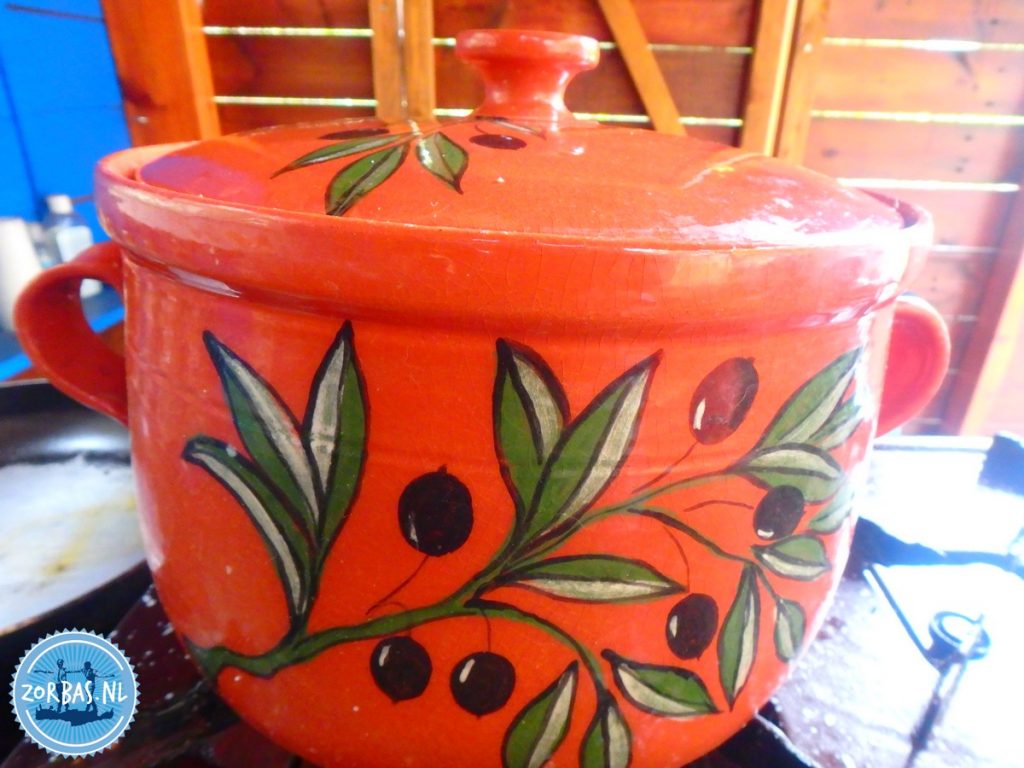
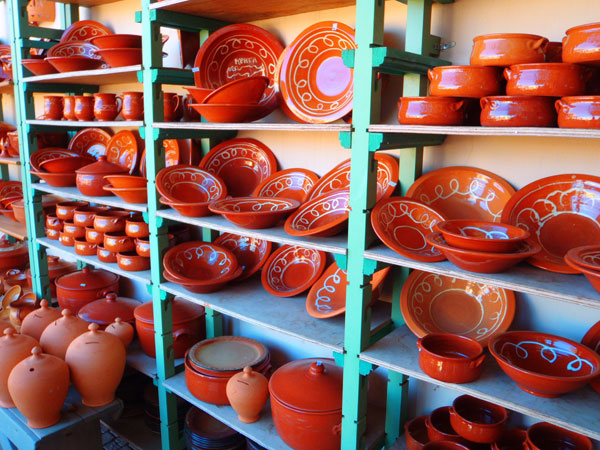
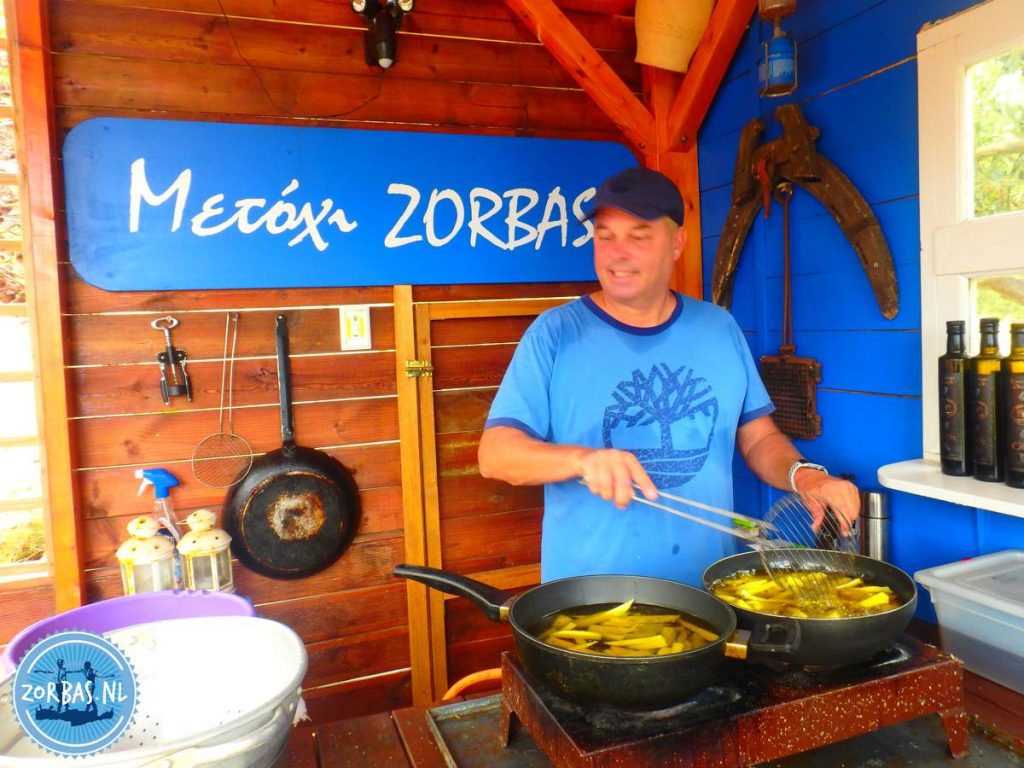
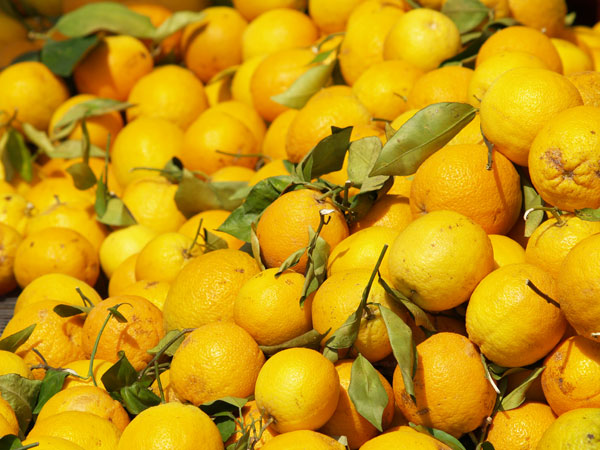
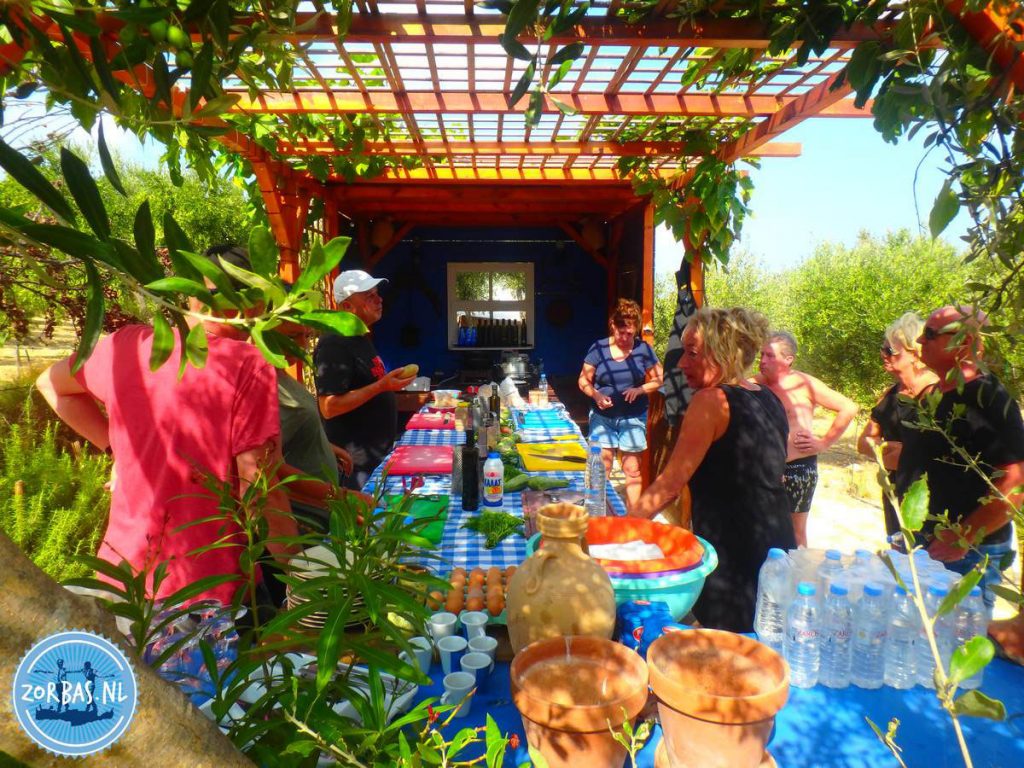
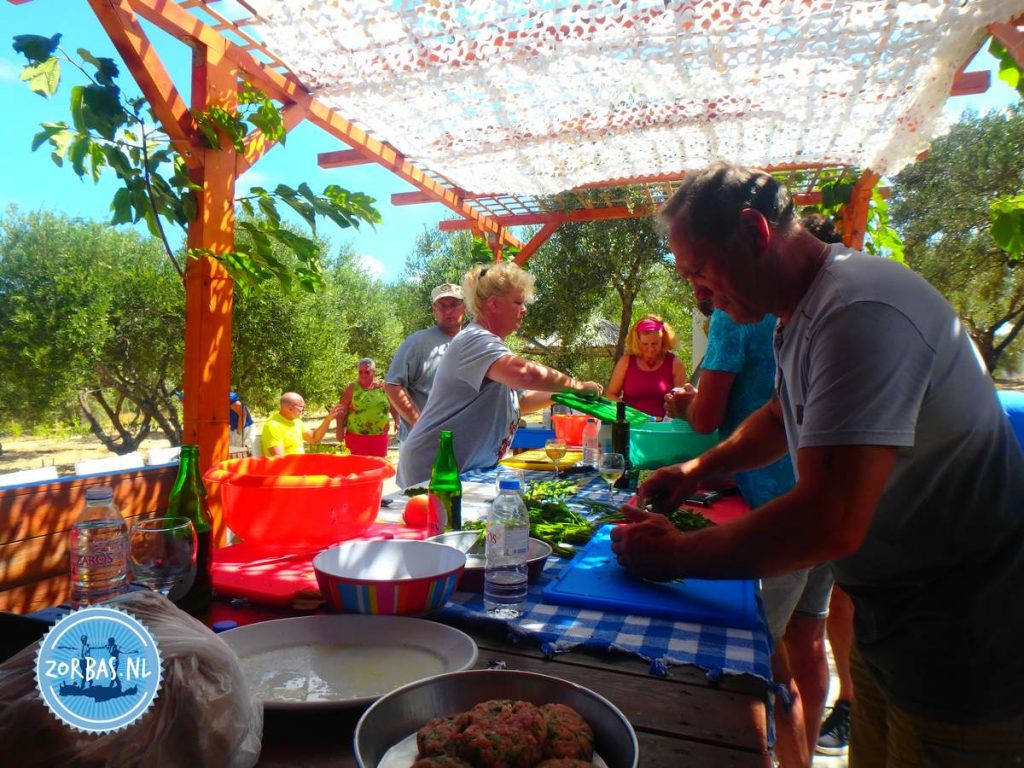
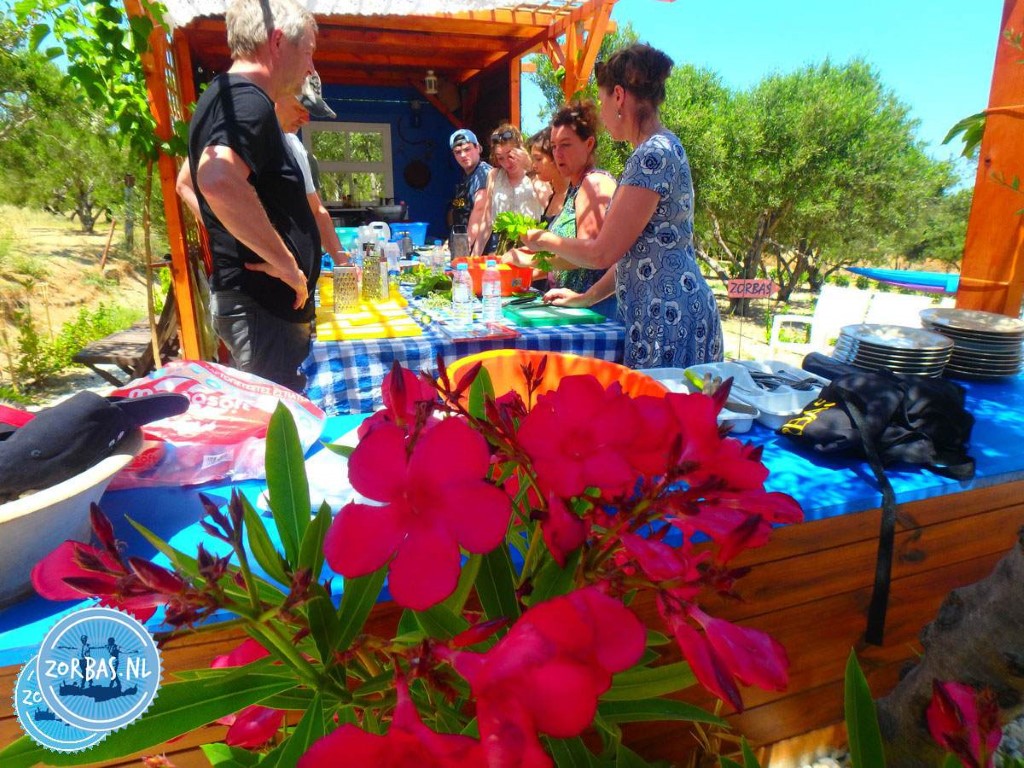
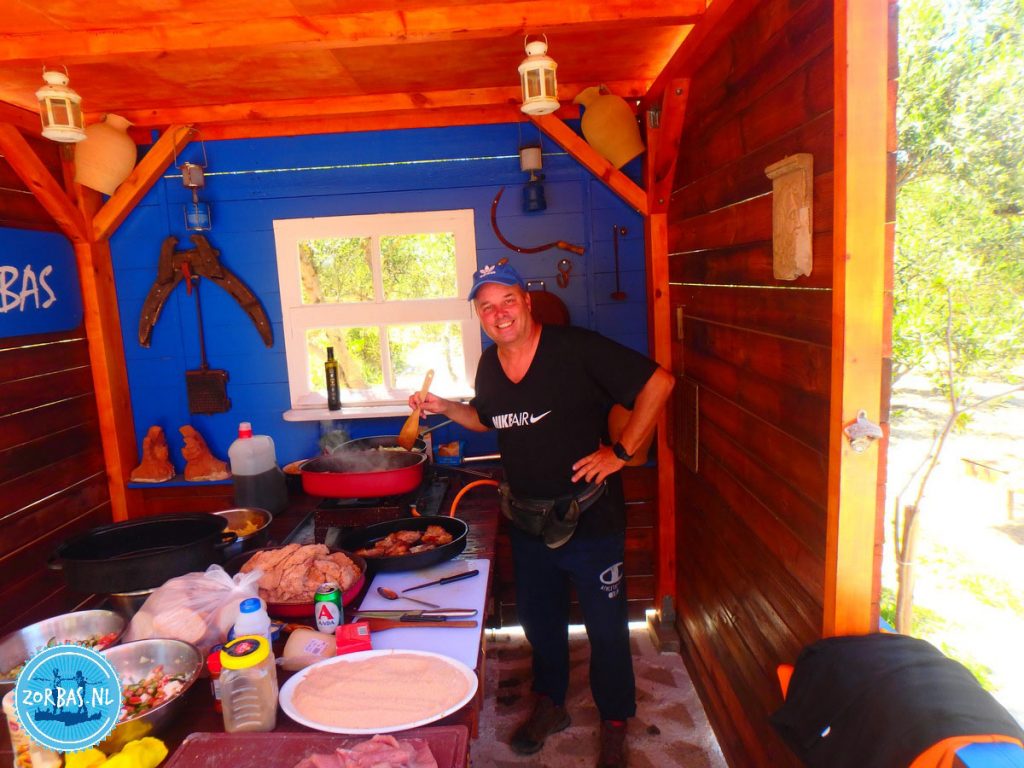
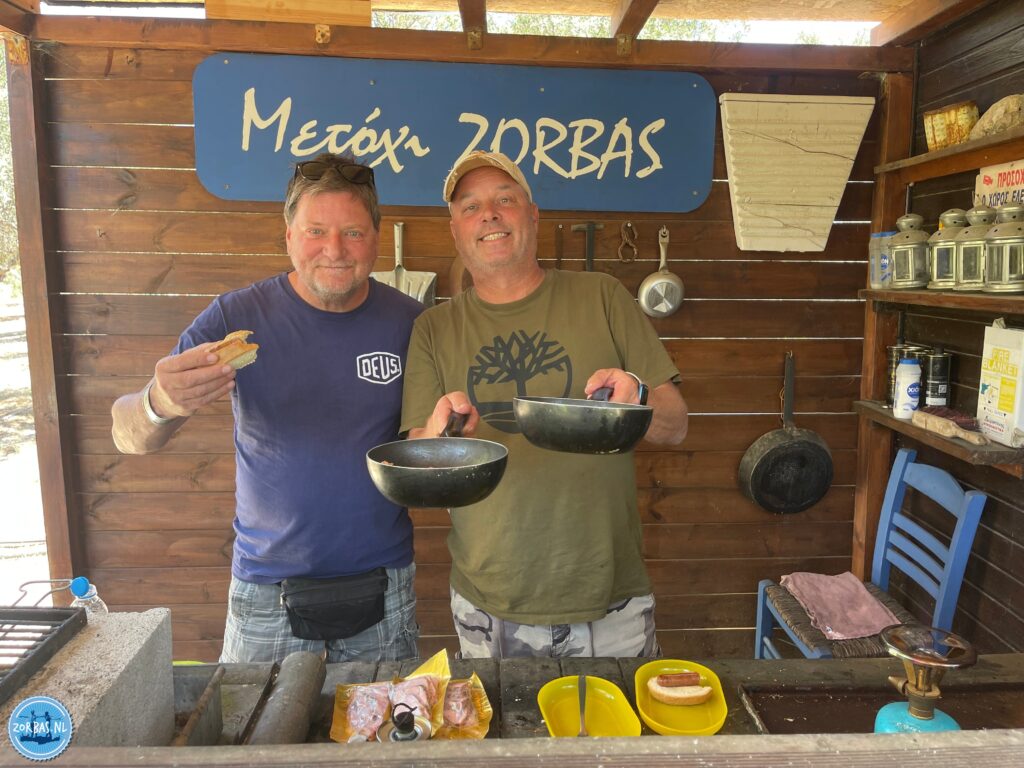
Greek cookbook of Zorbas on Crete: The Greek Cookbook of Zorbas Island (cooking workshops): regularly we give you a new recipe from our Greek kitchen at Zorbas Island. Now you are able to prepare all these healthy and delicious Greek dishes at your own home! Off course, you are can also taste all our Greek dishes while you are on holiday at Zorbas Island. We use always fresh (organic) local products for all our Greek recipes. At our Greek cooking workshops we will explain more about the ingredients and preparation of the Greek kitchen. Have fun with your Greek cooking and kali oreksi!
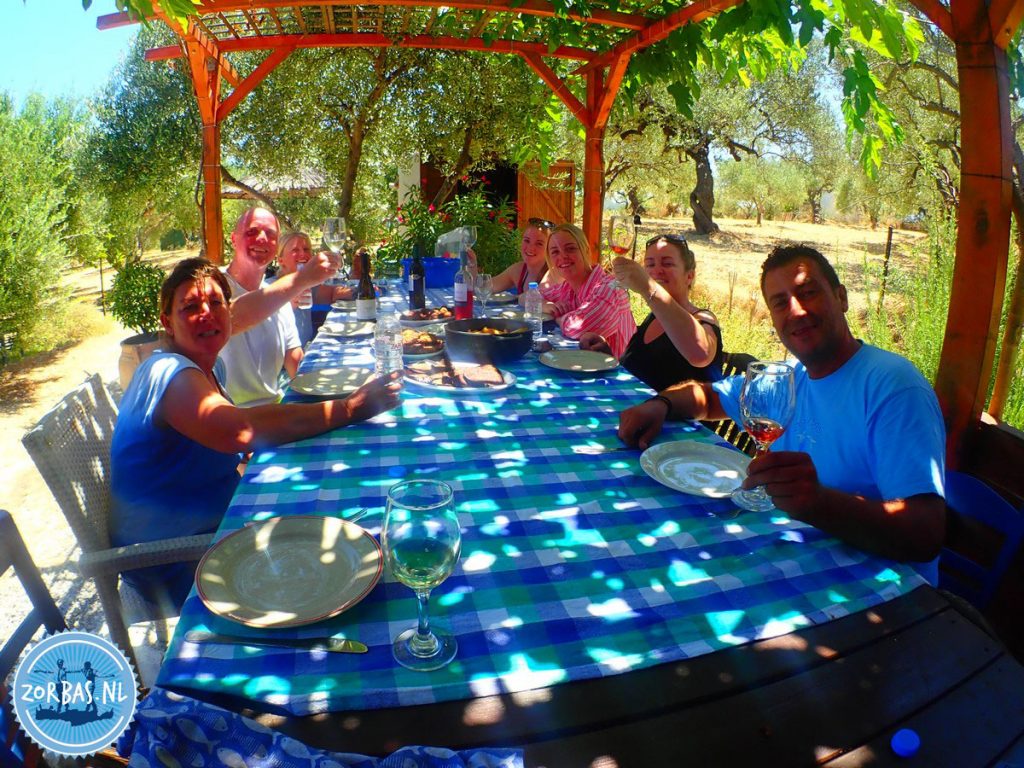
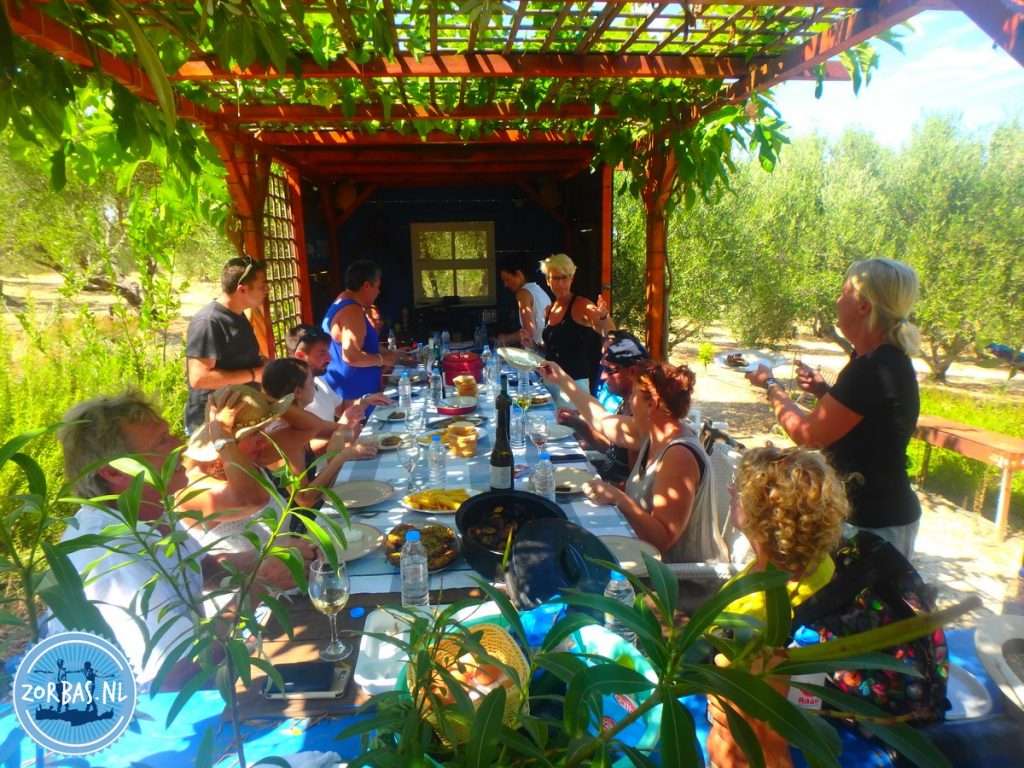
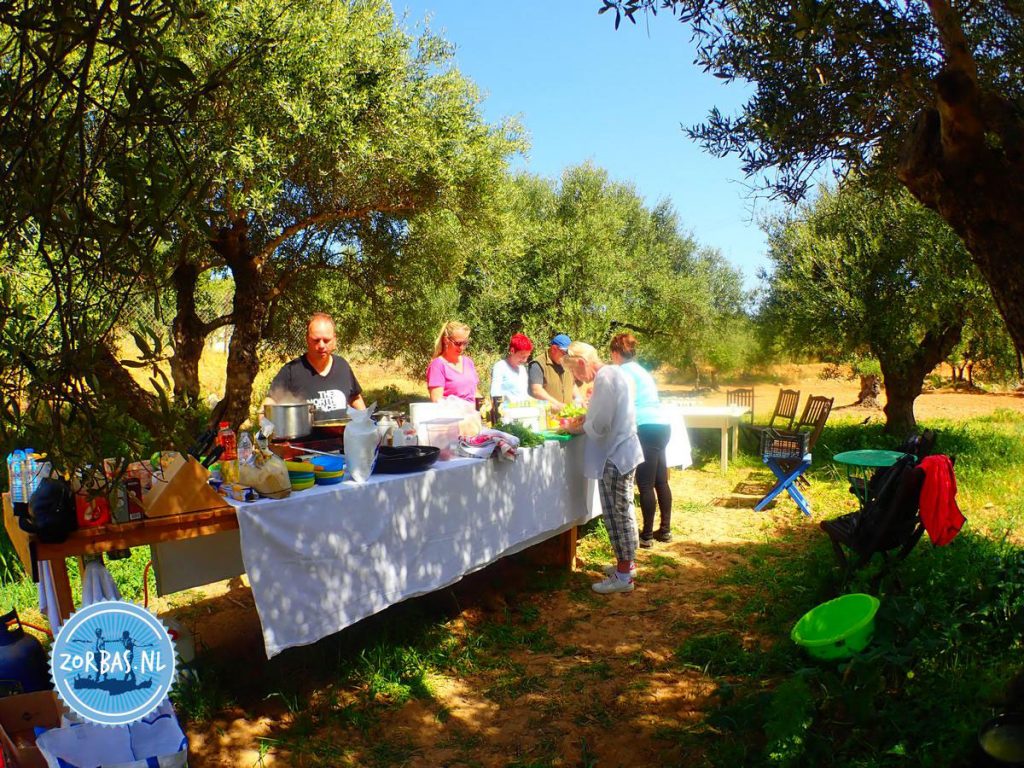
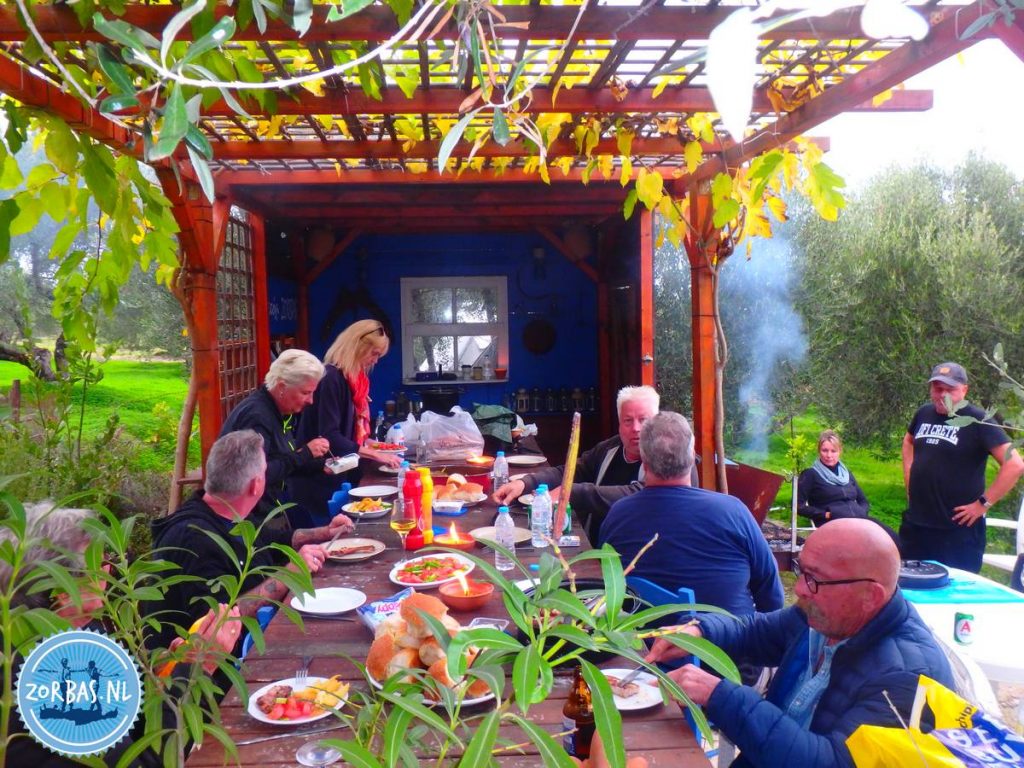
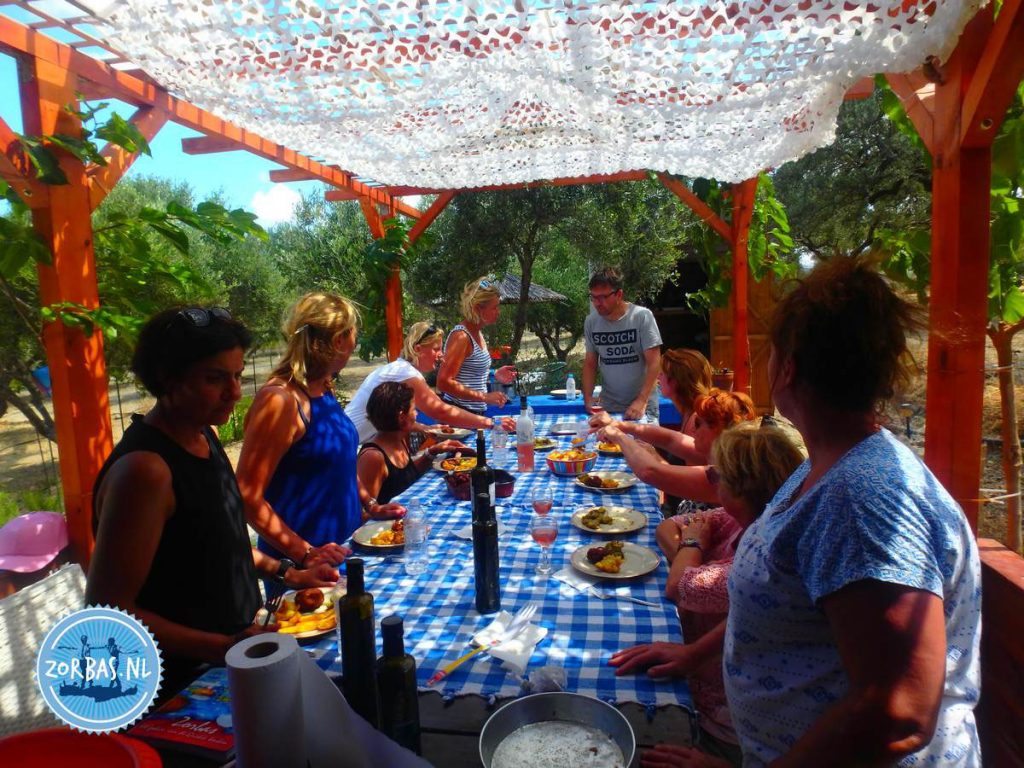
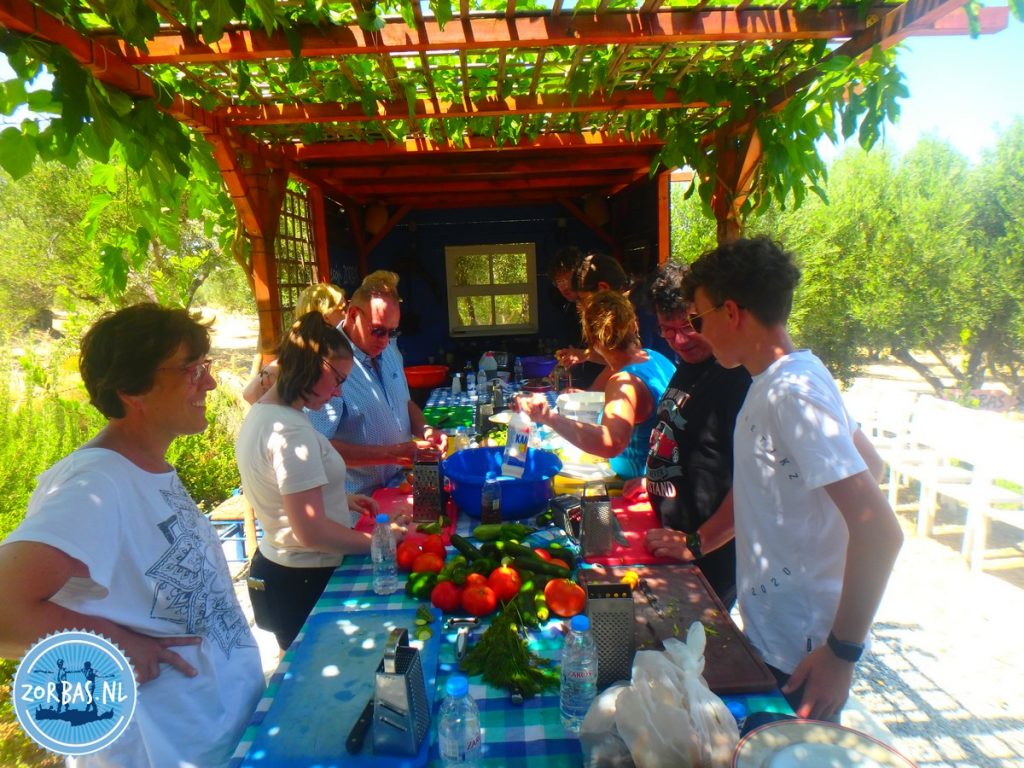
Cooking holidays on Crete: Learn Greek cooking in a week, a nice holiday where you learn the ins and outs of the Greek cuisine, culture and adventure on Crete. A complete week cooking holidays on Crete, enjoying the outdoors. On this page we give you an impression of our cooking lessons holidays on Crete.
Different Greek recipes
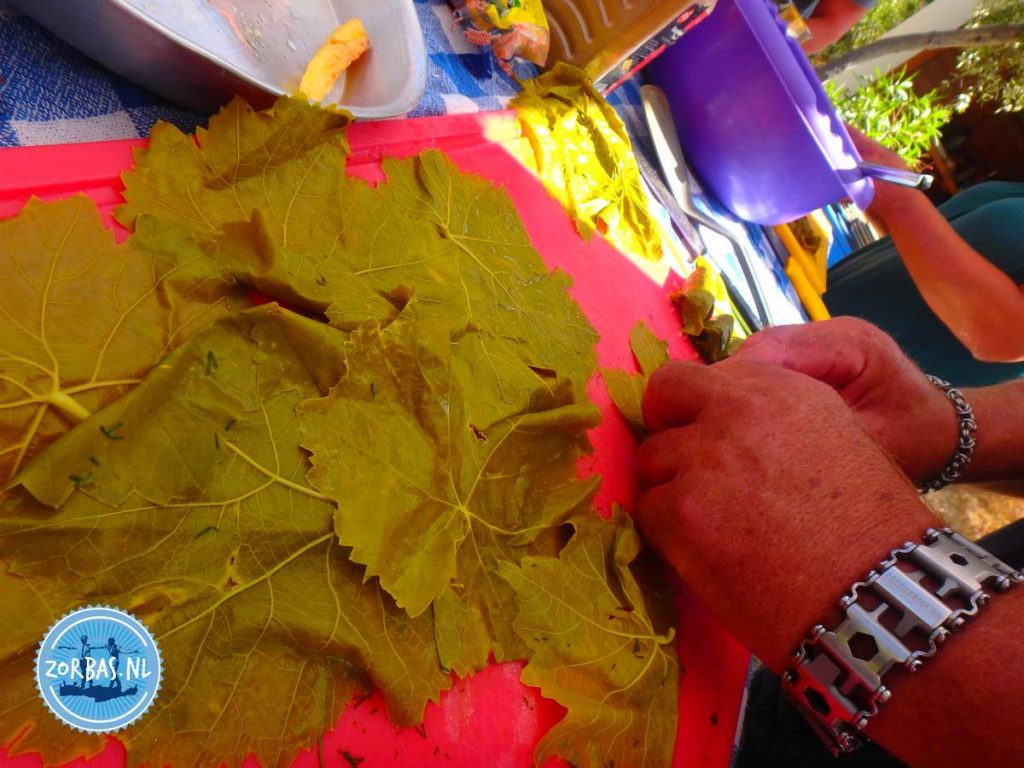
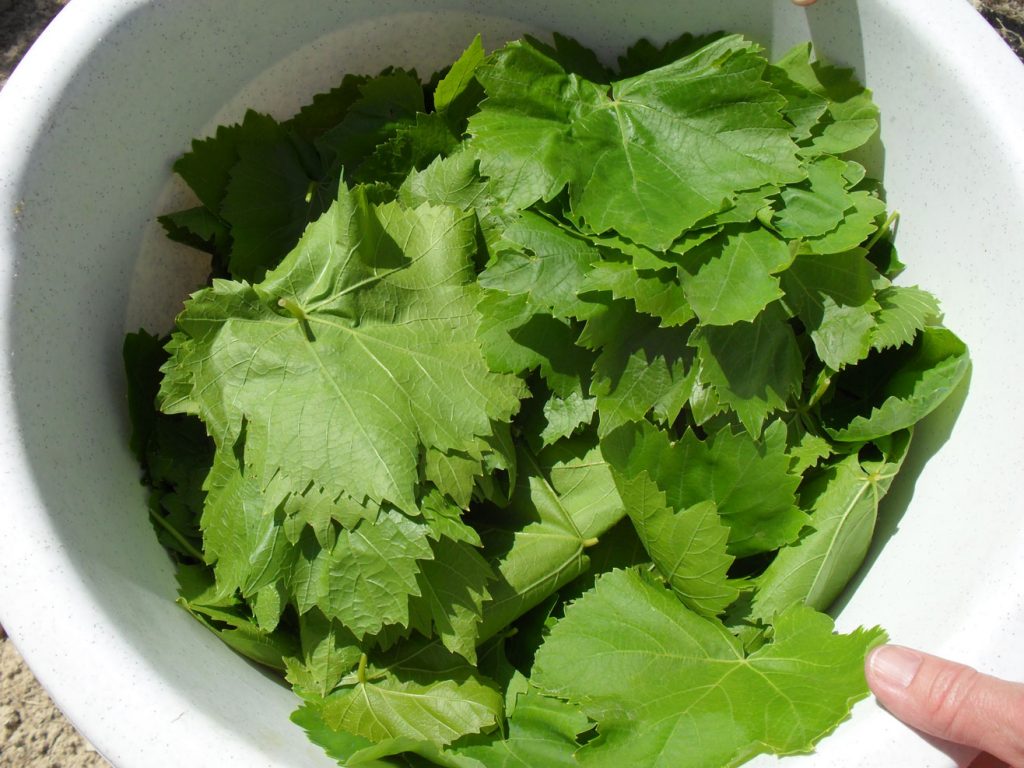
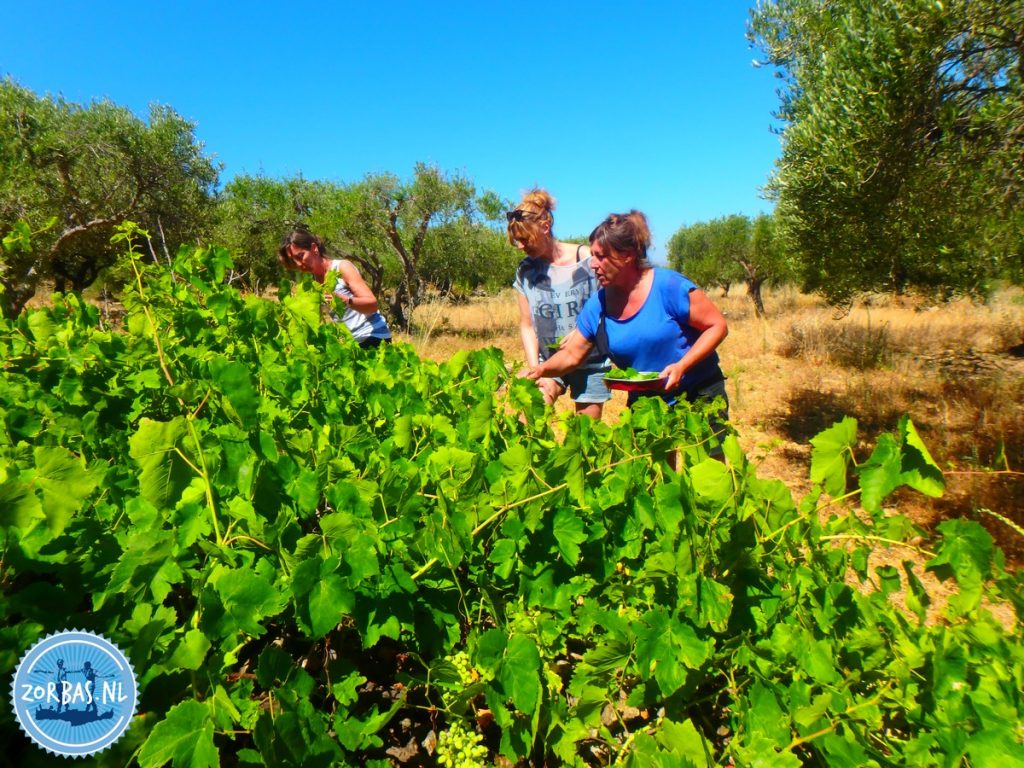
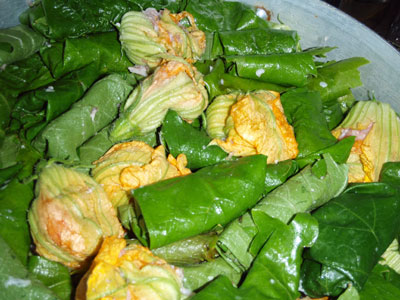
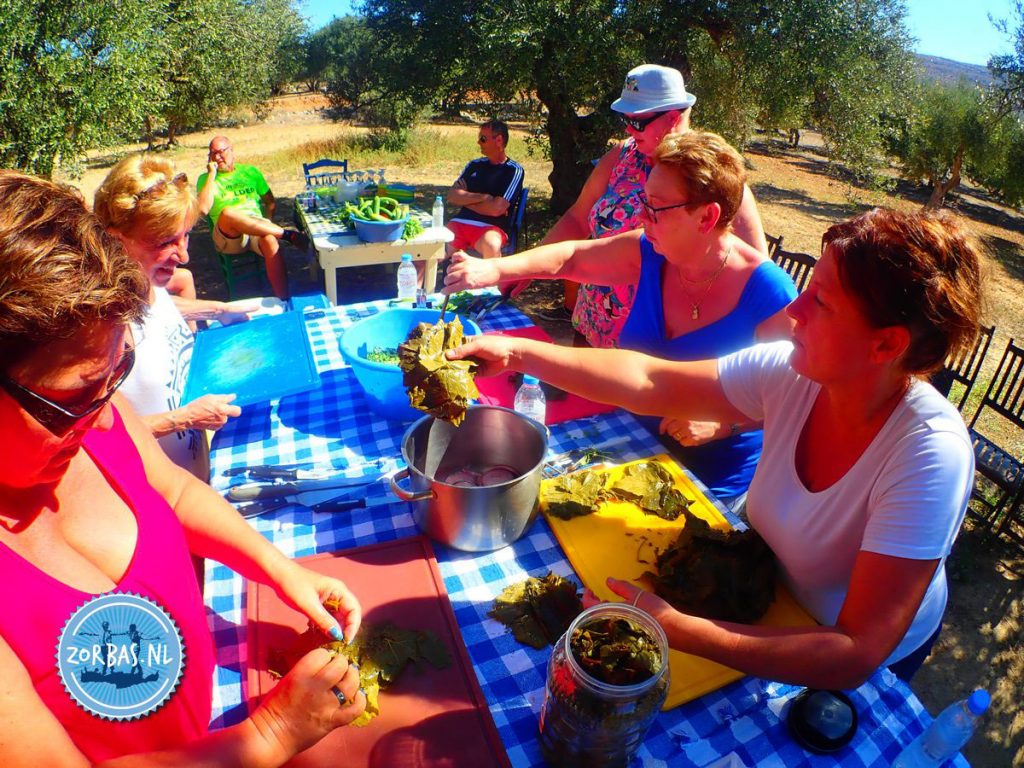
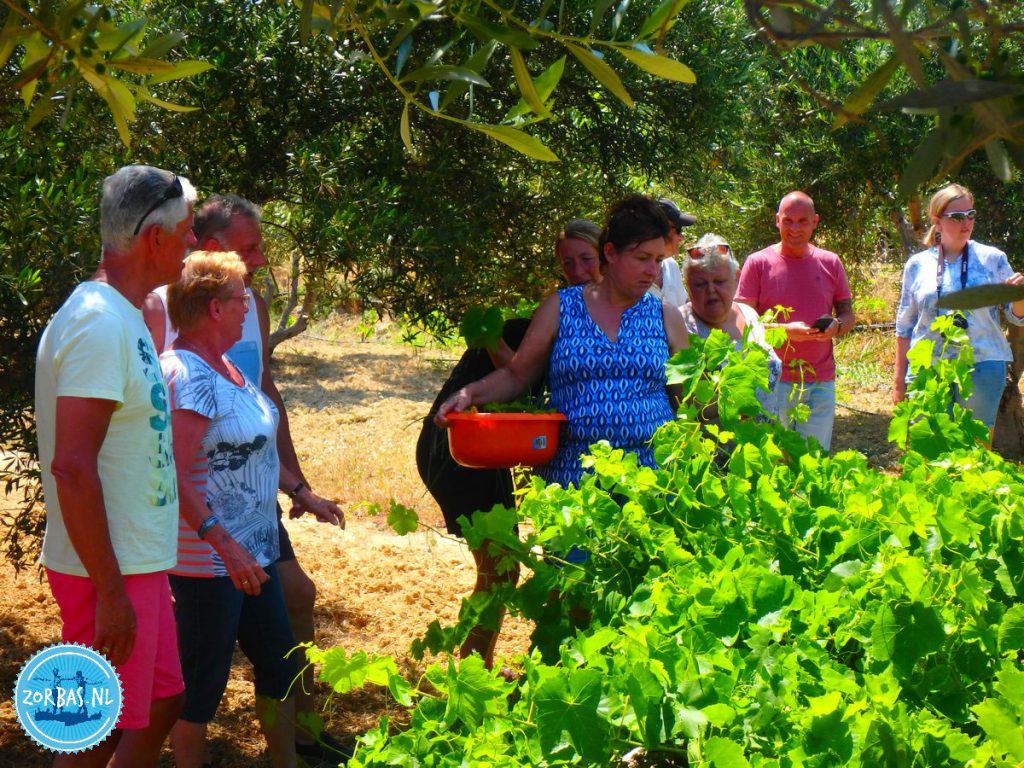
Dolmades – Stuffed vine leafs: Dolmades are made with the first young leaves from the grape vine. We use the fresh new leaves, because they are tender. An old leaf would have a very tough texture to eat. Yo can see many people in grape vine fields picking the leaves in the first weeks when they sprouted. We are lucky at Zorbas Island to be able to pick fresh leaves. The fresh leaf only needs a quick wash. The secret that Greek people can make dolmades all the year round is, that they are collecting thousands of leaves and preserve them.
To preserve the vine leaves, wash them and then pack them on top of each other in a jar or a plastic container, even as big as a bucket in some cases! Until it is full to the top a lot of salt is added in between all the layers and then pour cold water over to completely cover it.
The water should be changed every week for four weeks and more salt added after this. The leaves will keep in the brine for around six months. Another method is to take the leaves out of the brine, add more salt to them and place in a sterilized glass jar or air tight bag. All Cretan people will tell you that their mother makes the best dolmades! Dolmades are a lot of work to make well and take an amazing amount of time. The art is in the rolling. When you can do this with only one hand like many old Cretan ladies, you must have made millions!
Making dolmades
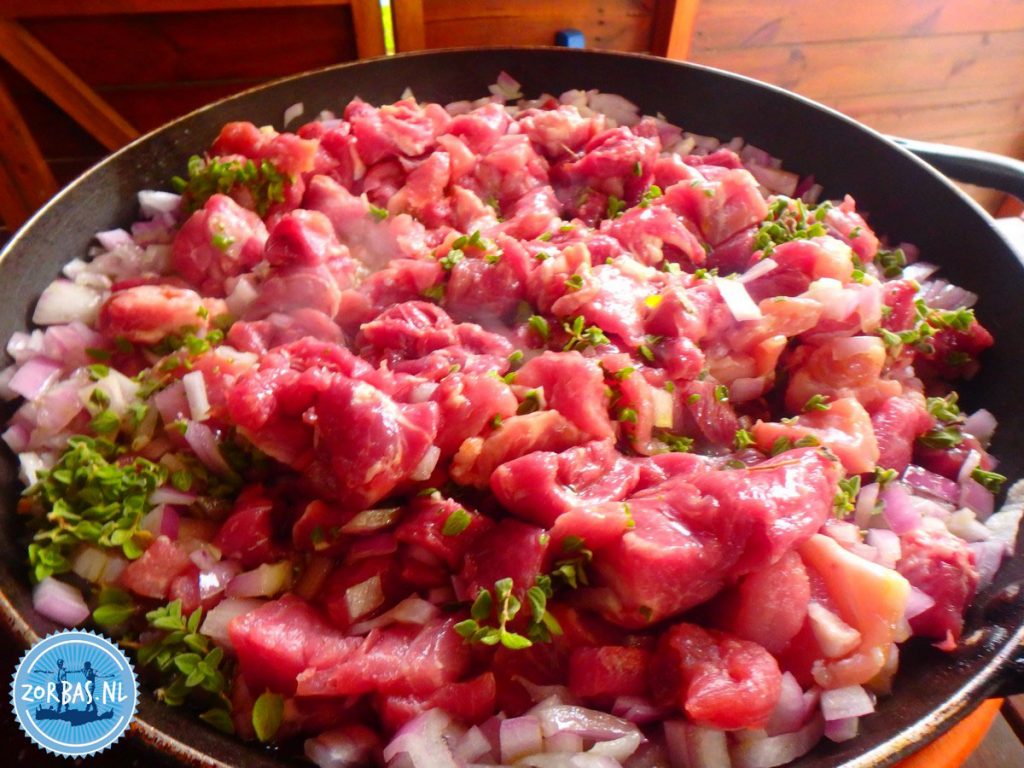
Recipe for 40 dolmades: Grape vine leaves (as many as you need, each leave makes a dolmade), 3 cups of white long grain rice, 1 large potato, 1 large courgette, 3 onions, sprig of dill, sprig of parsley, 2 hands full of mincemeat, pork or beef (optional: you can leave out it for vegetarians), salt & pepper and olive oil.
First prepare the cooking pan for 40 dolmades. Use a pan that a small plate can fit just inside. Later on, you will use the plate to sit on top of the dolmades when they cook. Also find a weight to put on top of the plate. I use a big stone I got from the beach. Peel a big onion and cut into thick rings to cover the bottom of the pan; this stops the dolmades from burning on the bottom of the pan.
Boiling the rice
Next boil the rice in water add a pinch of salt, boil until “al dente”, drain and wash with cold water. When drained place into a mixing bowl. Peel the potato and onion and wash the courgette. Next, grate all of these into the rice. Use the large side of the grater. Finely chop the dill and parsley and add to the mix. Add the mincemeat, if you are using it. Add salt and pepper to season and taste the mix to see if you need more. Mix everything well together.
Get your vine leaves, if you use the fresh ones, you only need to wash them with cold water. If you have bought preserved leaves: open the package or bottle and place in a bowl of cold water and leave for 10 minutes. This is to let the excess salt come out of the leaves, otherwise you can’t use them. They are far too salty, so have a taste to be sure, if there is still too much salt, wash again.
Start rolling
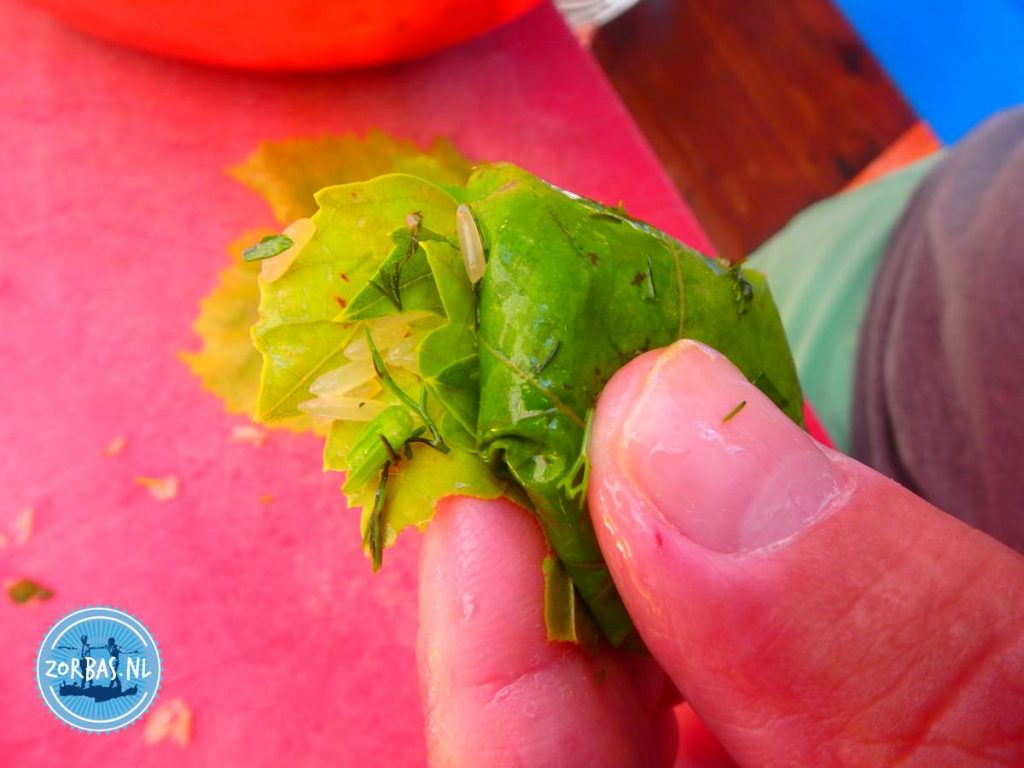
Ready for rolling? Here you go: look at the leaf, the thick vain and very slightly darker side is the back. Place the leaf on the work table, the stalk part is facing you. Get a small amount of the mix using your hands. Place in the middle of the leaf in a sausage shape across it. Next using both hands bring the bottom up to the mix and then the two sides and roll into a small neat parcel, keeping the mixture tight inside.
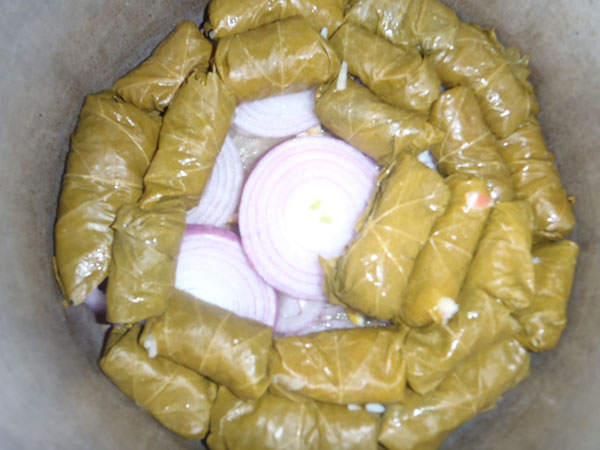
Place in the pan at the side. As you roll each dolmade, place back to back in the pan, packing them tightly together like a spiral. As each layer is complete, start the next one until you finished the leaves. Add a splash of olive oil to the pan and pour water into the pan, but don’t cover the dolmades, just above half. Next, place the plate on top of the dolmades with the weight on the top to keep everything secure as it cooks.
Bring to the boil and as soon as the water boils, turn down the heat to let it simmer gently for 20/25 minutes. Keep checking that the water is still visible, add more if needed to stop them from burning at the bottom of the pan. To see if the dolmades are ready: take one out and eat the leave, it should be cooked through and soft. Turn the heat off and let the dolmades stand until they are just slightly warm. This lets them set in shape. Take out and arrange on a serving plate. The most classic way is to place tzatziki in the middle and dolmades around the side. Together they are popular meze dishes.
Greek saganaki
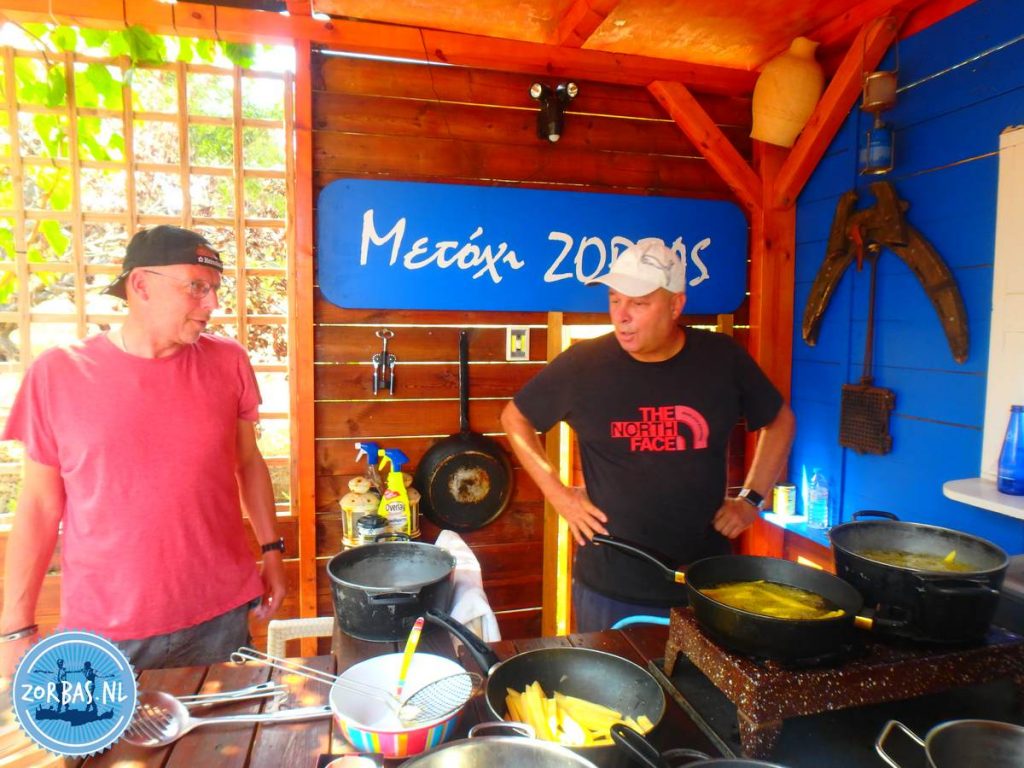
Saganaki: Saganaki is my personal favorite, as a snack or part of a meze meal. A meze is a collection of appetizer dishes eaten together. Saganaki contains traditional Cretan cheeses. These are hard cheeses and normally the best ones to use for Saganaki are Kefalotyri and Graviera. You can use the more modern cheeses such as Gouda or Edam if you wish, but the texture will be a lot softer. You need your choice of cheese in a 10 centimetres square block, approx. 5 centimetres thick, 2 eggs, salt, white flour self-raising, olive oil or sunflower oil for frying, 1 fresh lemon.
Cut the cheese into the right size and shape. Make sure you have plenty of room on the work surface for two bowls larger than the size of the cheese: one is for the flour and the other is for the egg. Break the eggs into one of the bowls and beat with a fork until mixed, put the flour into the other bowl and add a pinch of salt. Next get a frying pan and add oil for frying, enough to cover the bottom of the pan. With olive oil you’ll get the best result, but sunflower oil may be used if you wish. Heat the oil to frying temperature, you will know when it’s ready if you drop a very small amount of flour into the pan and it bubbles.
Fry the saganaki
The next action is very fast, so you must be clear what to do! Take the cheese and wash it in the egg mixture back and front. Next place the cheese into the flour and cover back and front. Take the cheese over to the frying pan and gently place into the oil. Fry this side until you can see that the bottom sides start to go golden brown. Now turn the cheese over with a spatula and fry until golden. If you have the oil too hot, the outside will be cooked but the cheese in the middle will not be cooked, so don’t heat the oil too high. Put the saganaki onto a serving plate and cut the lemon in half and place on each side. Squeeze over before eating. Enjoy your saganaki!
Souvlaki – pork or chicken
Souvlaki in Greece: Cut 1 ½ kilo of pork in cubes of 2 by 2 cm. Put the meat on 11 wooden sticks. Cover with lemon juice or squeeze fresh lemon over them. Sprinkle with salt, pepper and oregano. The souvlakis are now ready for your barbecue.

Tzatziki: Tzatziki is the most well known of all the Greek dishes, eaten on its own with bread or to go along side almost all the Greek kitchens delights. Tzatziki has many health benefits due to the fresh and organic ingredients used. The main one is Greek yogurt with its rich and creamy texture; it is particularly full of prebiotic values for a healthy gut (stomach). The Greek yogurt that I use at Zorbas Island is full fat sheep yogurt of the best quality. The secret of good tzatziki is in the yogurt. The healing and cooling power of the yogurt, told by the old Cretan people, is a perfect after sun treatment. When burned rub onto the skin and leave to dry, it takes the heat out of the skin. It really works! Another main ingredient is garlic: fantastic for regulating blood pressure and general well being.
Ingredients for tzatziki
Ingredients: Full fat Greek yogurt (the best you can buy), 1 kilo, cucumbers 4 large (or a sprig of dill if you do not like cucumbers), garlic, 6 cloves, salt, pepper, olive oil and wine vinegar.
First, wash and chop the ends from the cucumbers. Next, grate them with the skin on into a colander. Place it in the sink so any liquid will drain away. Get a full hand of table salt and mix it into the grated cucumbers. Leave it to drain for at least 5 minutes. The table salt lets the cucumbers release all their water. If you do not do this, the tzatziki mixture will have too much liquid. Place the Greek yogurt into a mixing bowl and flatten with a wood spoon. Peel the garlic cloves and chop them into very small pieces or use a garlic press, add the garlic to the Greek yogurt by sprinkling it over the top.
Last steps of making the tzatziki
Take a hand full out of the colander and squeeze the water out. Add the cucumber to the yogurt and garlic, continue until finished. Next, add all the other ingredients: olive oil, vinegar, a pinch of salt & pepper and mix together. The best way to mix, is to use your hands in the Cretan way. Tasting is very important and season again if you think it needs more. You can eat the tzatziki straight away, but to my opinion it tastes better after a night in the fridge, to get the flavours to work together. It will keep in the fridge for up to a week. Tzatziki tastes particularly good with roast meats and potatoes and of course pita bread and Greek salad.
If you do not like cucumbers, you can use the same recipe and replace the cucumber with chopped dill. This is a very light tzatziki perfect to combine with fish.
Melitzana Salata
Melitzana salata – Aubergine salad: Aubergine or also known as the eggplant is one of the most beautiful vegetables used in the Greek kitchen. Aubergine has a shiny deep purple colour and fat round body, full of healthy seeds. It grows very easily due to the warm climate. The aubergine is not only deep purple, you can find varieties of white or white and purple stripes due to cross breeding of the vegetable over the years. The first aubergines found on Santorini were white and much smaller in size than the big purple cousins. They named it eggplant as they resembled eggs. An old Cretan wives tale says that aubergines have aphrodisiac effects and in ancient times called the apple of love.
The aubergine can taste bitter when you cook it plain. In oil the flesh is like a sponge soaking up all the oil. To cook the aubergine too its best, use herbs, sauces and other ingredients so the aubergine can take all the flavours into its flesh. Another way to use the aubergine is to grill it on the BBQ or in the oven. You must pierce the skin with a fork to stop it from exploding when it cooks. You can use all the beautiful flesh from the skin.
Different types of melitzana salata
Melitzana salata with Greek yogurt: 4 big purple aubergines, 1 big clove garlic, salt & pepper, olive oil, 4 table spoons of Greek yogurt, a small squeeze of lemon juice.
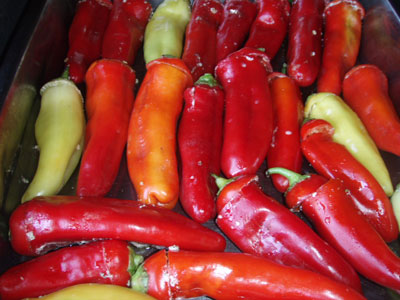
Melitzana salata with red peppers: 2 red peppers or hot paprika (your own personal choice), 4 big purple aubergines, 1 big clove of garlic, salt & pepper, olive oil.
The best way to cook the vegetables is by far on the BBQ. I’m lucky to do this all year round at Zorbas Island, because of the great weather on Crete. The smoky taste of grilling really comes out into the vegetable, so if you can, use the BBQ. Wash the aubergines and peppers (if using them) and stab all the vegetables with a fork 3 to 4 times all over.
Put the aubergine in the oven
You have to do this to help the cooking process and to stop the aubergine from exploding, not nice to clean your oven or BBQ! When you use the oven, heat the oven at 150 degrees Celsius. When it is hot, place the vegetables inside and the skin will start to blister and go a little black. This is no problem, it is the flesh that you want. Leave the aubergines for 20-25 minutes. Keep checking the peppers, maybe they are ready before a large aubergine, so you can take them out.
Take a aubergine out to check, you want it all to be very soft and the flesh falling away from the skin. You can test this with a fork. Cut the aubergine in half and with a spoon scrape the flesh out into a mixing bowl. It is surprising how much natural oil the aubergine has. Throw the skin of the aubergine away. Roughly chop the aubergine with a knife in the mixing bowl about 7-8 times. You want the texture to be rustic, not a soft puree. Very finely chop the clove of garlic and add with all the other ingredients: Greek yogurt, pinch of salt and pepper, lemon juice (very little) and a splash of extra virgin olive oil. Mix it very well together and place in the fridge until completely cold. Mix again before serving.
Recipe if using red peppers
If making the red pepper recipe: peel the skin of the pepper flesh. You may want to wear plastic gloves if using hot pepper. Slice them into thin long strips, take all the seeds away. Add to the aubergines with the salt & pepper, a squeeze of lemon, finely chopped garlic and a good splash of olive oil. Mix well, you can add a couple of spoons of Greek yogurt if you wish, but the traditional recipe is without yogurt. The aubergine salads are popular meze dishes and go well as a spread on traditional village bread or as an appetizer.
Stuffed vegetables
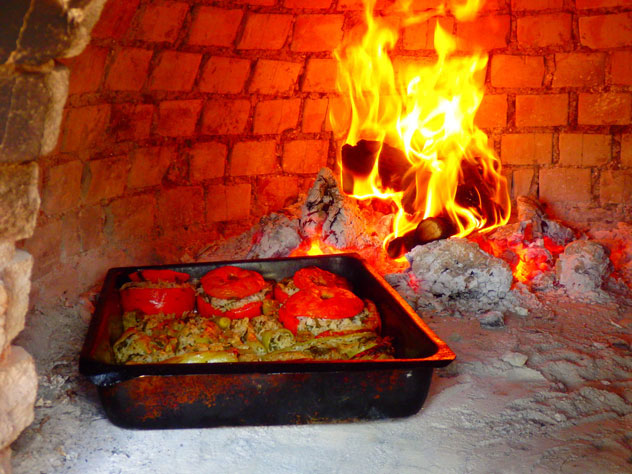
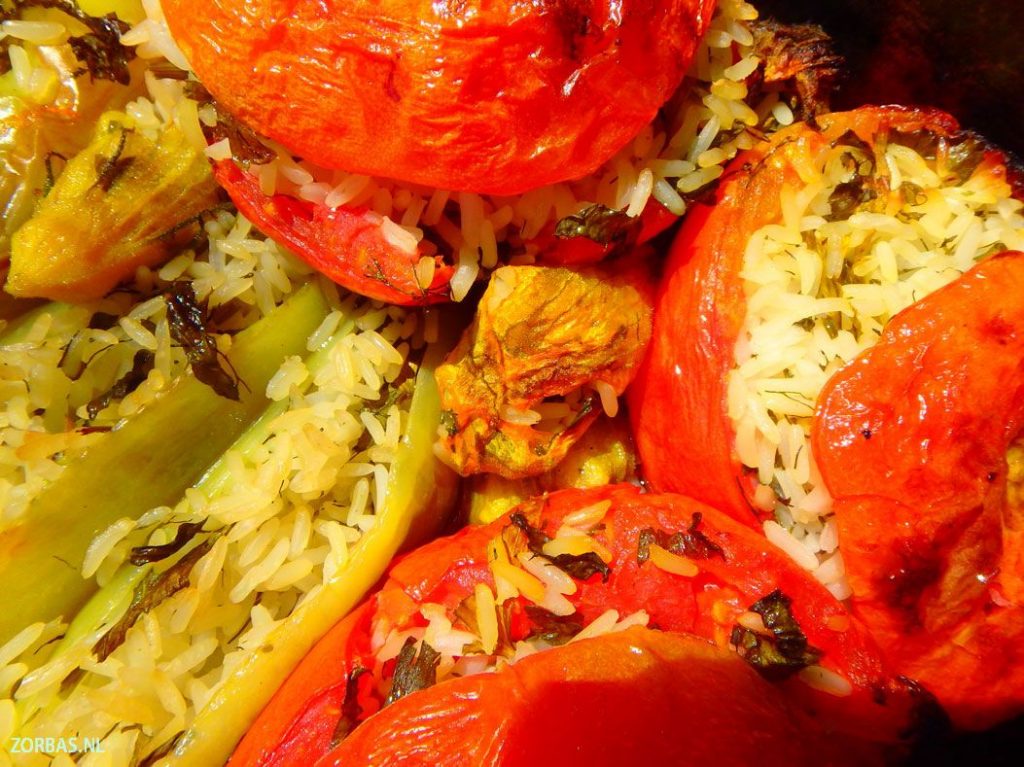
Piperia – Stuffed bell peppers: Cut the top of the bell peppers and clean out the insides. Stuff the bell peppers with a mixture of 100 grams feta (3 slices), 10 tablespoons of olive oil, a small handful oregano, salt, pepper and 4 cloves crushed garlic. Place the bell peppers in a baking tray with olive oil and put them in the oven at 200 degrees for about 30 minutes.
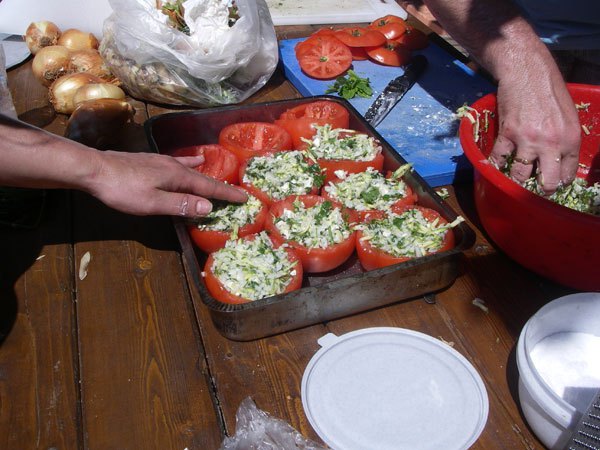
Gemista garides – stuffed tomatoes with shrimp: Empty out the tomatoes and stuff them with a mixture of 300 grams shrimps, 100 grams finely chopped feta, salt, pepper and 2 tablespoons olive oil. Bake the tomatoes for about 45 minutes at 200 degrees in the oven.
Olive oil dressings on Crete: Dressing 1: 1 twig of rosemary with olive oil. Dressing 2: Crushed garlic with olive oil. Dressing 3: Mint leaves with olive oil.
Bekri Meze
Bekri Meze: Pork meat in wine: The word “meze” means small plates, the word “bekri” is the name of the dish. If you needed to eat it or asked to eat Bekri Meze in the old days, you were having a jolly good time somewhere in a local kafenion. All Cretan villages have a kafenion, some villages have more than one kafenion. The kafenion is also in all the towns, it is a social meeting point in the area. It is very much a men’s world in a kafenion, almost all the customers are men.
The home of the true kafenion is in the village. A kafenion is often a very plain old fashioned room at the front or side of the owner’s home. In a few cases, it is actually their living room as well as the kafenion! A kafenion usually has plain wooden chairs and tables. It is not unusual to find the toilet outside or through their house or even in the neighbour’s house. A visit to a traditional kafenion is a must.
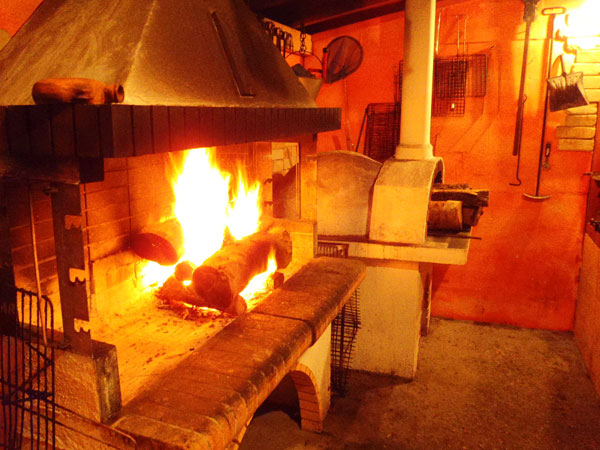
There will be a “somba” (traditional wood burner) in the kafenion for the winter nights in the mountains. In the mountain villages the temperatures can be low and it is possible to snow higher up the mountains. Wood is thrown in the somba all the time. All the flat topped sombas can also be used for cooking on and there is a side door used as an oven. This is the best way to cook potatoes with the skin on and these are often put into the oven for the customers. In winter they roast chestnuts on the top and many more small meze dishes.
History of Bekri Meze
You can find many drinks at the kafenion: local Raki is very popular (after producing wine, the leftovers of the grapes are distilled), Ouzo (aniseed liquor), Metaxa (Greek cognac), village wine, bottled beers and of course some soft drinks. It is a place for the men mostly to chat, relax, read the newspaper and of course play “tavli”: the game of backgammon.
The old story of the Bekri Meze is common knowledge to Greek people. Late at night or early hours of the morning if the company had been very jolly and the drinks had flowed well and people needed to soak up their drinks, they made Bekri Meze for them to eat with village bread. It fills fast and was cooked on the somba in the kafenion, before they went on their merry way or stayed longer to continue the party!
Recipe for pork in wine
Bekri Meze – Pork in wine: pork meat (enough to fill a small plate per portion i.e. meze), 1 glass of red wine, oregano, salt & pepper, olive oil.
Cut any pork meat into very small pieces, without the bone. Leave some fat on, it adds a lot to the flavour. Place the pork meat in a frying pan with olive oil and sprinkle salt, pepper and oregano on it. Mix the meat all the time, fry until golden brown.
Add the red wine and cook until it thickens. Serve the Bekri Meze with village bread.
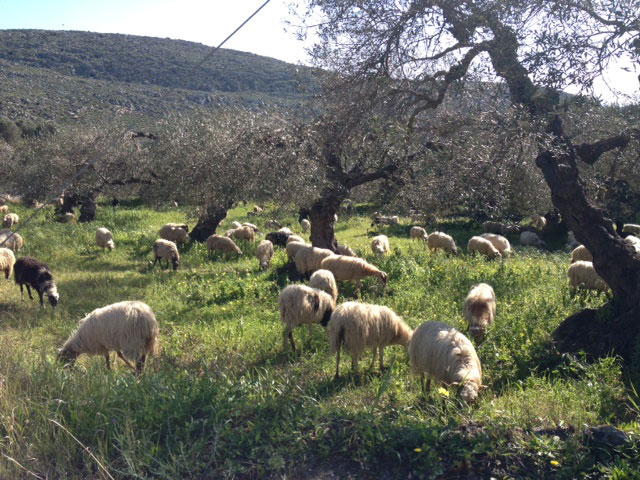
Goats and sheep on Crete
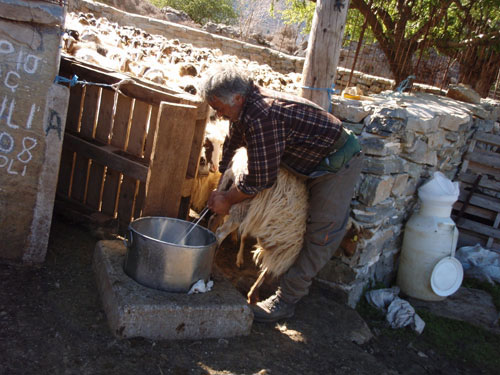
Goats and sheep are very important animals to keep in Crete. Besides their dairy, people eat their meat on religious feast days such as Easter. Up in all the mountain villages you will see them everywhere. Shepherds keep their goats and sheep always very well. Making cheese and Greek yogurt from their fresh milk organically goes generations back and is very much part of everyday life in the villages.
Milking the goats or sheep kept by a family is usually the job of the grandmother or mother of the household. Then they will make the cheese, yogurt or boil the milk, so it can be drank later when cold. You can also make ice cream from goat milk. After a full day of grazing, a goat can produce up to 5 litres of milk a day, been milked in the morning and then again in the late afternoon.
To make feta cheese, get some fresh goats or sheep milk or milk your own animals if you are lucky to have them. Clean the milk by pouring it through muslin cloth, heat the milk in a large pan to around 80 degrees. Do not let it boil! Add “Renit”, which is an enzyme to make the milk separate the curds from the liquid. Place the curds into a cheese basket and press it down, adding salt all the time. This is where the salty taste from the feta cheese comes from. Then leave it to dry and take shape. When the cheese is ready, store it in water and slice into feta.
Other type of saganaki
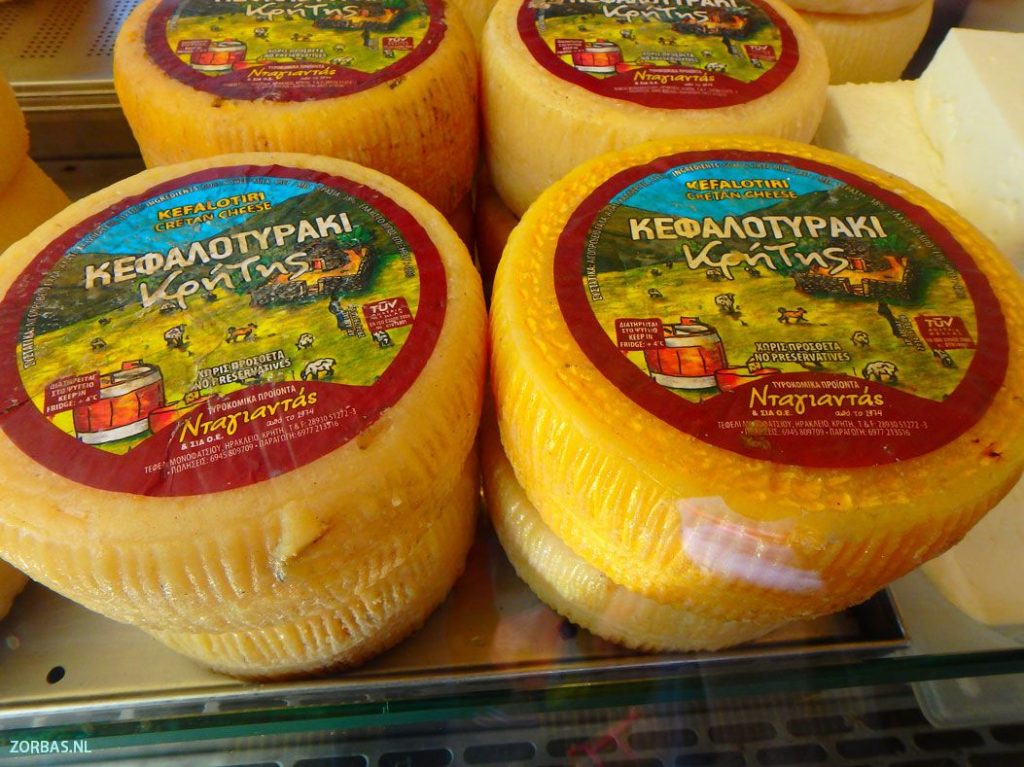
Garides saganaki me feta – Shrimps baked in the oven with feta cheese: Feta means a slice in the Greek language, so feta cheese is literally a slice of cheese. Greeks always serve the feta cheese by the slice, on its own with olive oil poured over the top and sprinkled with oregano or on the top of a Greek salad. There are many other ways to use feta cheese. Cooking with it is very special, it keeps its unique texture and taste, even at high temperatures. They claimed that feta cheese originally comes from Crete. The first recording was over a thousand years ago being made by the Cretans and still today its produced all over the island. The best feta cheese is a mixture of goats and sheep milk, some say about 30% goats and 70% sheep milk.
Ingredients and recipe
1 kilo shrimps, 400 grams of feta cheese, 3 large fresh tomatoes, olive oil, 1 large onion, oregano, a sprig of parsley, salt & pepper, a clay pot is the best thing to use. It also looks traditional as a centre piece for the dining table.
The shrimps can be whatever size you like, but use peeled shrimps. Wash your shrimps under cold water. Also defrost the shrimps if you cannot get fresh shrimps. Boil the shrimps in a little water until they just start to turn pink, drain them but keep the water. Chop the onion into medium size pieces and fry with the olive oil until golden brown. Chop the tomatoes. Add the tomatoes to the water from the shrimps (your own stock) with salt and pepper and boil until it becomes thick.
Arrange the shrimps and the onions covering the bottom of the pot and pour the tomato sauce over the top. Chop the feta cheese into large blocks and place over the top. Sprinkle with the oregano and chopped parsley. The shrimp saganaki is ready to go in the oven for approximately 30 minutes at 150 degrees. Keep checking the shrimp saganaki and when its brown, take it out. This is one of my favourite dishes and very tasty. Some people add a shot glass of Ouzo to the tomato sauce when preparing it. Shrimp saganaki is a good meze dish or as a main meal and great if you have friends to eat.

Stifado
Stifado main dish: originally they made stifado with hare meat that the Cretan men would go out hunting for. After a period of time they nearly killed all of the hare on the island, making them very difficult to find. Now Cretan people keep the cousin of the hare, the rabbit, which also makes a very tasty alternative and is used as the traditional meat for stifado, still eaten a lot in the villages. The onions used in the original recipe are very small. They are whole onions shallots, if you cannot get them, sliced big onions are fine. However, people visiting Cretan taverns want often a different meat, so they also use beef and this gives a very rich stifado.
Stifado with beef or rabbit
1 kilo braising steak beef or 1 whole rabbit, 8 large onions, 2 bay leaves, 2 kilo fresh tomatoes, ½ litre dry red wine, salt & pepper, 2 table spoons sugar, 1 box tomato puree, 1 cinnamon stick (optional to your taste), olive oil, 12 whole black pepper corns.
At the butcher, if you buy the rabbit, ask for it to be cleaned and skinned and chopped into bits. If you want to use the beef, ask the butcher to cut it into stew size chunks. Wash and take the stalks off the tomatoes and chop into pieces. Place the tomatoes in the blender and blitz until it becomes pulp. Set the tomato pulp aside. Peel all the onions and chop in half and half again and again, so you have rough cut to give the stifado texture. The onions will break down during cooking. Get a good cooking pan with a thick bottom, that can stay on the heat for a long time.
Cooking the meat
Place a good amount of olive oil all over the bottom and put onto the heat. Let it bubble slightly and add the meat. Season with salt and pepper. Let it braise very slightly brown. Next add the red wine, the bay leaves and pepper corns. Bring to the boil. Add the tomatoes pulp from the blender and the puree. Mix it well. At this time, add 2 large spoons of sugar to balance out the acidic flavour of the tomatoes and put the cinnamon stick in if you wish to use it. I prefer not to, as the stifado for me becomes too cinnamon tasting. Add all the onions, mix well and let this all boil again and mix. Boil for 15 minutes, then turn the heat down to simmer slowly cook for a further 1 hour. Keep mixing and watching. Taste and season. Cook until the meat is tender and sauce is thick. Serve the stifado with white or brown rice, mashed potatoes or chips.

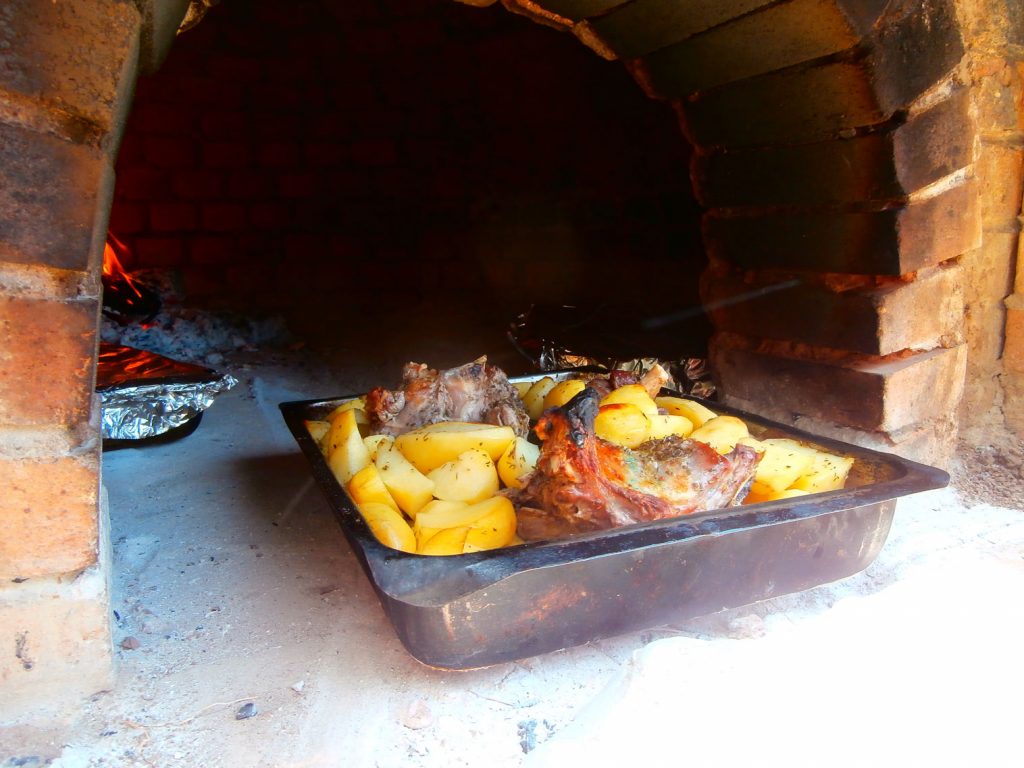
Kleftiko – the stolen food
Kleftiko parcels: traditionally cooked lamb: Kleftiko is a very old and well know dish all over Greece. It is also a patriotic dish from the time of the Greek resistance. Kleftiko means in Greek: “to be stolen”. To steal something is: “klefto”. The name of this dish comes from how the Greek resistance fighters invented it. When the Turks invaded and occupied Greece in 1453, the Greek resistance fighters were hiding up in the high mountains.
They had to be very carefully for their lives. High up in the mountains there was not a lot of food, so when it was night, they would come out of hiding to look for food. The animals easy to find were lamb, so they would steal them and kill them. They took whatever vegetables, herbs and fruits they could find from the fields. In the mountains they were risking their lives every time or else they would starve to death.
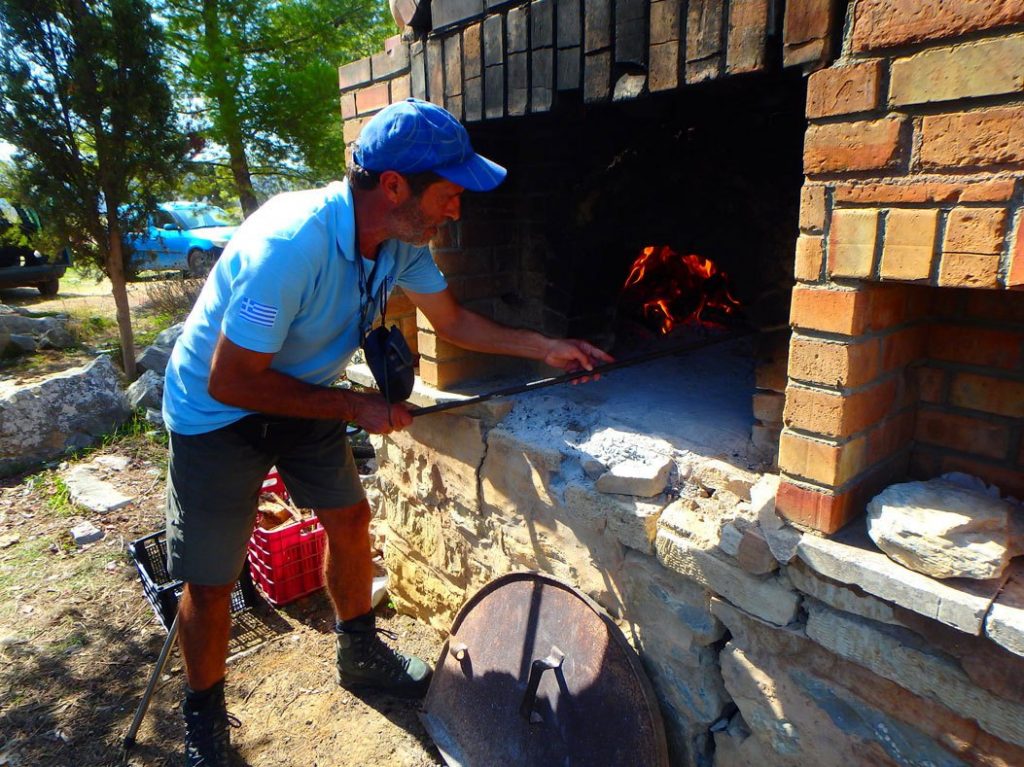
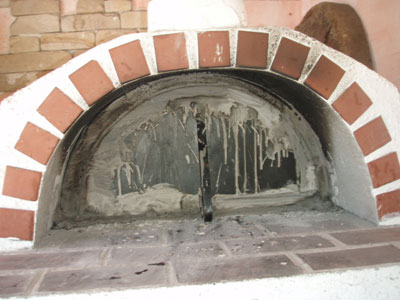
When they were ready to cook the meat with the vegetables and herbs, they had to cook it in a very unusual way. They dug a hole in the ground and started a fire until the embers were extremely hot. They put the meat and other foods into clay pots with lids on top and placed on top the embers. Then they placed soil loosely covering the hole. They cooked the meat underground, so no smoke would appear in the sky or the smell of the cooking would give the hiding place of the resistance fighters away.
How to make kleftiko
Kleftiko parcels: lamb, beef or pork meat (lamb is the traditional meat), a good sprinkle of oregano, a good sprinkle of thyme, 1 bay leaf for each parcel, olive oil, salt & pepper, 1 large clove garlic for each parcel, 1 large fresh tomato for each parcel, a splash of fresh lemon juice, feta cheese or hard cheese (Kefalotyri is traditional Cretan cheese or Rigiano).
The kleftiko was traditionally cooked in clay pots. You can also use these if you have them, but they will be quicker to cook in the oven. Another way to cook kleftiko is to use aluminium foil. Measure a square big enough to place the meat in the middle and the other ingredients on the top. Then scrunch the foil together over the top tightly to form a parcel. You can also cook the parcels in the oven. The way I like best though, is on the BBQ in between the hot charcoals. This is more like the original way. The clay pots will take a longer time to cook this way.
Making the parcels
The meat should be in big chunks without bones. To get a portion size for each kleftiko parcel, fill the palm of your hand full of meat. Place the meat into the middle of the clay pot or foil. Chop the garlic, oregano, thyme and fresh tomato roughly and mix it together in a bowl. The herbs give a lot of flavour to the dish, so give a good amount if making more than one parcel. Adapt the mixture to the amount you need. Next cover the top of the meat with the mixture. Add a squeeze of lemon juice and a good covering of extra virgin olive oil. Season with salt and pepper. It is very important to mix all the ingredients good together, using your hands. Rub all ingredients well onto the meat.
Cooking the meat
The meat is now ready to cook. The last thing to add is the cheese. When you use feta cheese, chop it into blocks and place the feta cheese around the meat. But when you use hard cheese, place this on top of the meat. If you cannot get the Cretan cheese, use the Italian Rigiano or a similar one. Cut the cheese in a big square and place it over the top of the mixture. Now close the kleftiko.
If cooking on the BBQ, it will take 45 minutes to 1 hour. Check if the meat is cooked tender. The oven will be around the same time for foil parcels. A clay pot takes longer as it needs to retain the heat first before the food begins to cook. The oven temperature should be on around 150 degrees. If you place the clay pot into the hot charcoals, it may take a few hours to cook. Slow cooking is what makes all the flavours of the kleftiko work so well together and the meat very tender.
Pita bread and tzatziki as a side dish with the kleftiko is delicious together!!!
The pita bread needs to be covered lightly with extra virgin olive oil and fried on a griddle pan on each side until golden brown. You can also place the pita bread onto the barbeque and grill it until golden. Tzatziki, the Greek yogurt cucumber and garlic dip, is a really good topping on the pita bread.
Pastitsio – Oven dish with thick pasta and ground beef
Pastitsio – Oven dish with thick pasta and ground beef: Cut 2 onions, dice 4 tomatoes, put to a boil the thick spaghetti with the bouillon/stock cubes till it’s ready. Fry the onions in oil and add 4 kilos ground beef. Fry till the beef is ready with some extra oil, salt, pepper, dash of nutmeg and a dash of cinnamon. Add the tomato cubes and some tomato puree. Make sure the ground beef is not too “wet”. Let this simmer for about 15 minutes. Grease an oven tray with olive oil. Put a layer of spaghetti in the tray and press it down tightly. Sprinkle a layer of grated cheese over the pasta and add a layer of the ground beef mixture. Add another layer of pasta and grated cheese. Press the layers tightly together for the dish to be sturdy.
Béchamel sauce: Make a béchamel sauce with 6 tablespoons of butter, 8 spoons of corn flour and 4 cups of milk. Heat up the milk with some salt and then put half of the warm milk in a bowl. Add the flour into the bowl and stir well until it looks like a cream. Add this cream back into the pan with the rest of the hot milk and add also the butter. Stir well until it thickens up. Take it off the heat and pour it over the pasta. Now it is ready to go into the oven at 200 degrees for 45-50 minutes until golden brown. After you take it out from the oven, it has to cool down for at least half an hour before you cut it into portions.
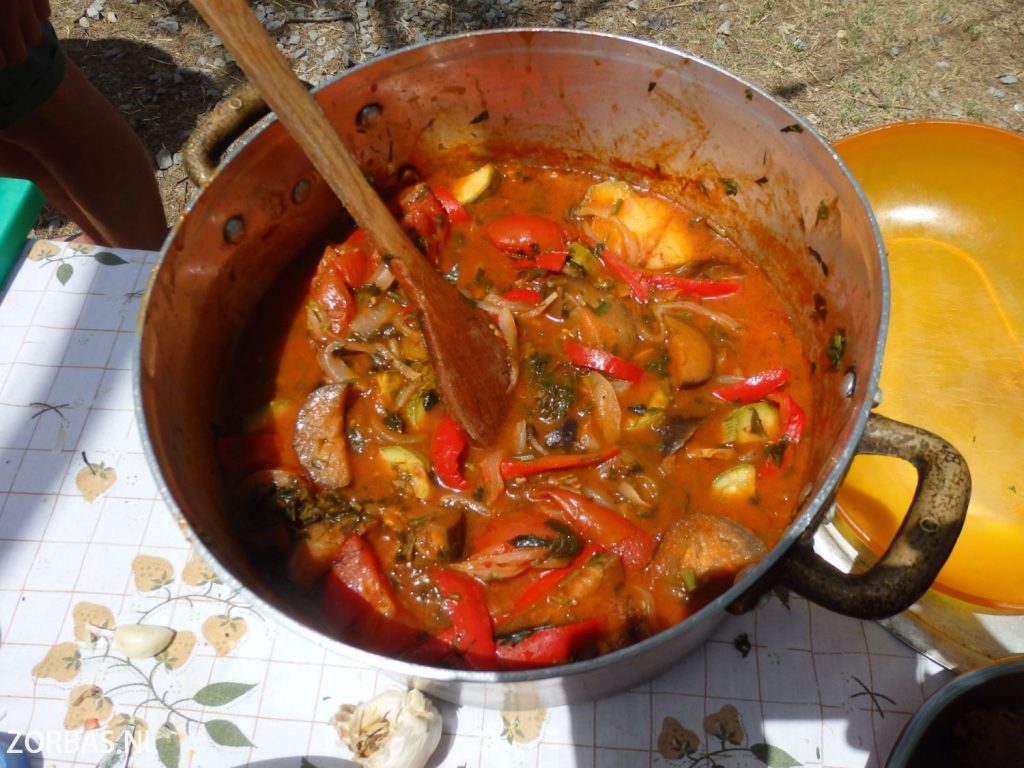
Vegetable and meat dishes
Briam: Cut 5 to 6 eggplants in slices and dice 5 zucchini. Grate 5 tomatoes, crush 5 garlic cloves, chop 4 spring onions or 2 large onions, chop 2 bell peppers. Mix all of this in a pot with 2 bay leaves, salt and pepper, 3 to 4 tablespoons paprika powder, 2 bouillon cubes and one cup of olive oil. Let it simmer till it’s ready in about half hour.
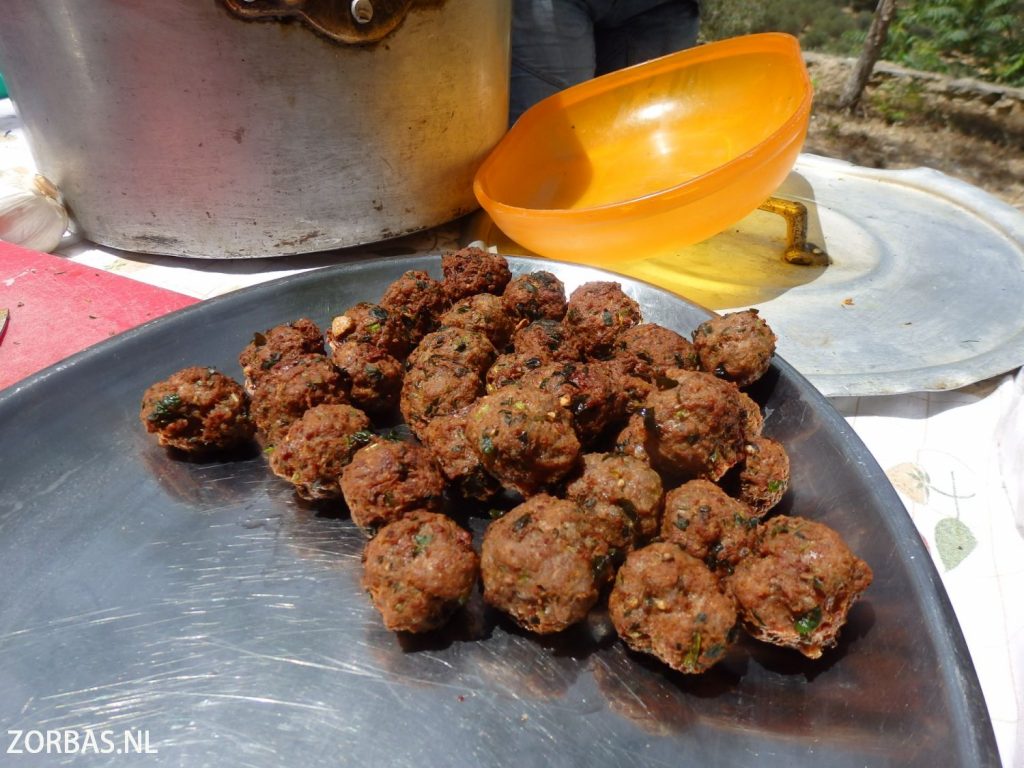
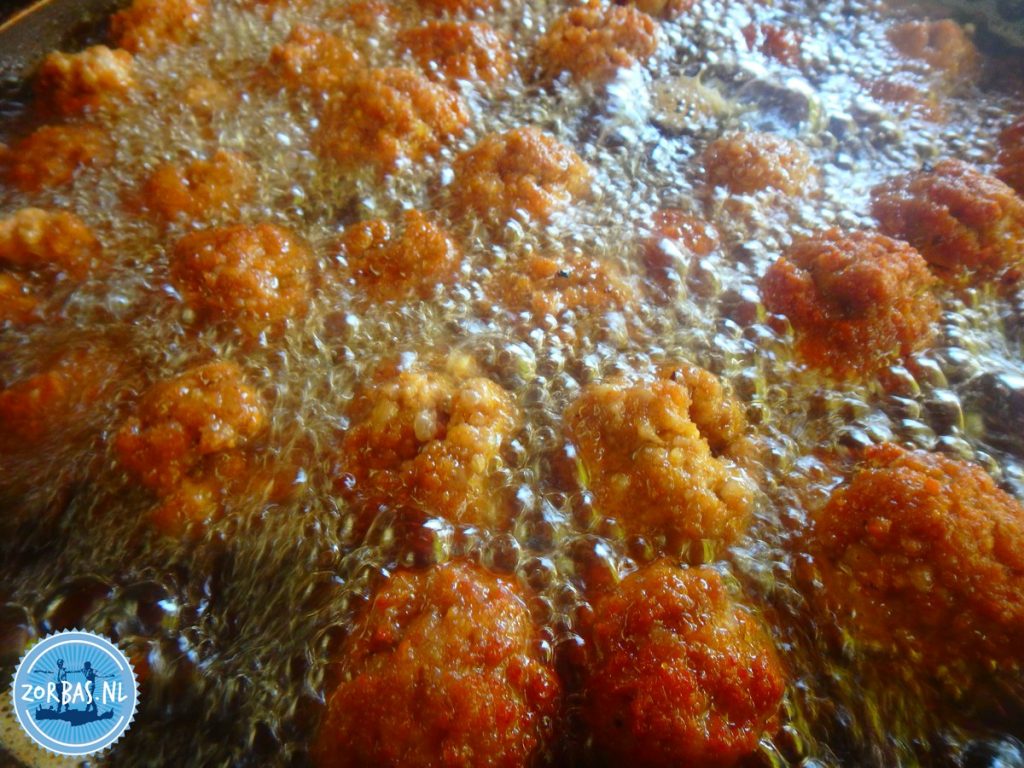
Keftedes – Greek meatballs: Mix 2 kilos of ground beef with 5 crushed garlic cloves, 3 eggs, 3 spring onions, salt, pepper and a handful of oregano. Add some flour and the olive oil last. Grease a baking tin with olive oil. Make balls of the ground beef mixture and put them in the baking tin. Grate 3 big tomatoes and divide them around the meat balls. Bake the meatballs in the oven for 40 minutes at 250 degrees.
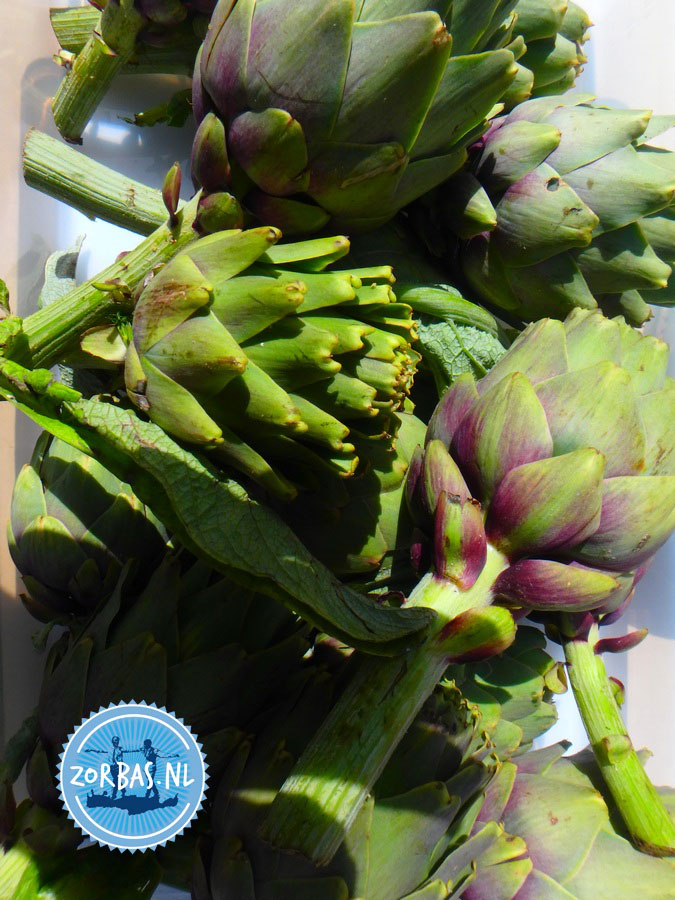
Anginares: Artichokes with egg (Greek: Anginares sfoungato) – Artichoke salad (Greek: Anginares salata) – Artichokes with Lamb (Greek: Anginares me Arni)
The Artichoke is a native plant of the Mediterranean and Greece and the most well know vegetable. It is one of the oldest foods that humans know of. Tey say that in the 1st century AD a Greek surgeon was travelling with the Roman Emperor Nero using the Artichoke for its use as a liver tonic and to help make more gall flow in the body. Ancient Greeks and Romans considered artichokes a delicacy and an aphrodisiac. In Ancient Greece, the artichoke attributed to being effective in securing the birth of boys. On the Island of Crete, the artichoke grows all over the different regions and the harvest is in the spring months between mid February and the end of April.
There are two types of artichokes that grow on Crete; the Globe Artichoke the most known for commercial use and the Cretan wild Artichoke with very spiky leaves. To clean these, you have to wear gloves, since the spikes can be very painful. The part that we actually eat is the plants flower bud. If you leave the plant growing, it can reach a height of 1 meter and the flowers bloom a pretty violet blue color. The Artichoke comes from the thistle group of the sunflower family. There is a lot of history and myth surrounding this plant.
History of artichok
According to a Greek myth the first artichoke was a woman of enchanting beauty named Cynara, who lived on the island of Zinari. The God Zeus, who was bored of the women on Mount Olympus, went to visit his brother Poseidon on the island. He met the young woman there, fell in love with her and decided to make her a goddess. They moved to Mount Olympus, but Cynara missed her home and mother so much that she would sneak back to earth to visit her. This infuriated Zeus, who in a fit of rage, hurled a lightning bolt at Cynara and turned her into the first artichoke.
The Latin name for Artichoke is Cynara and the Greek name is Anginara.
How to clean artichokes
Wear thin rubber gloves to stop your fingers from staining brown. Mix in a bowl lemon juice and a little water. With a small sharp vegetable knife chop the stalk off and then pull all the leaves off, until you are left with a small round ball shape. Using the knife carefully, cut into the top so you can see the hairy fiber in the base, which is the part called the Choke. Don’t eat the Choke and it needs to be removed down to the flesh. What you are left to cook with, after all this work, is not more than a small round Artichoke, but the taste makes up for all the time cleaning. Then drop it into the lemon water mixture, so the artichoke does not turn brown before cooking. Continue the same procedure until you have what you need for the dish.
Anginares Sfoungato – Artichokes with eggs
Ingredients: 3 large Artichokes, 8 eggs, salt & pepper, ¾ tea cup of virgin olive oil, ½ cup white flour.
Remove the leaves and clean the Artichokes. Place in a bowl with lemon water. Then slice them thinly.
Heat the olive oil in a non-stick frying pan over moderate heat. Put flour in a bowl with a pinch of salt and pepper and mix well. Flour the Artichoke slices and drop them into the frying pan to cook. Beat the Eggs together in a bowl and add a little salt and pepper. Add the Eggs to the Artichokes and gently mix with a fork. Let it all cook slowly. Turn the Sfoungato over to the other side when the bottom is golden brown. The best way to do this is to get an oversized pan lid and place it over the frying pan. Turn it over above the sink in case of spillage and slide it from the lid back into the pan. Also cook the other side until golden brown. Cut the Artichoke Sfoungato into 4 pieces and serve warm with Greek salad and village bread.
Anginares – Arakas – Pansetta zesti salata / Artichoke – pea – pork lardoon warm salad
Ingredients: 12 Artichokes, 200g green garden peas, 200g broad beans, 400g pork lardoons / pancetta, salt & pepper, olive oil.
Clean the beans and peas from the pods and leave the artichokes in lemon water when cleaned. Boil a pan of water with a pinch of salt. When the water is boiling, add all the vegetables. You want to cook them until they still have a little bite (al dente). Keep checking, so they do not become soft like mush, but also not too hard to eat. Once ready, drain the vegetables in the sink. Chop the pork into very small bits and place them into the frying pan. Season and cook until golden brown. Now add all the vepetizer or as part of a Meze.
Anginaras vrasta – Boiled artichokes
Use as many artichokes as you wish, it is only the flesh of the leaves that we eat. Furthermore you need salt & pepper, 400g Greek yogurt, 4 cloves of garlic, 4 spoons mayonnaise.
Make a garlic dip by mixing the Greek yogurt, mayonnaise, finely chopped garlic, salt and pepper together. This is for dipping the artichoke leaves into when you eat them. Boil a pan of salted water. When the water is boiling, put the artichokes in whole into the water. Leave to boil for 30-40 minutes and drain. Pull the leaves away from the bottom and dip into the garlic sauce and eat. The part you eat is at the bottom part near to the stem of the Artichoke. Use your teeth to pull of the flesh of the leaf.
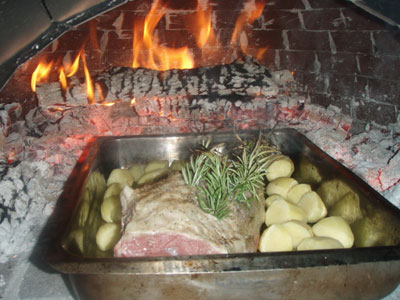
Anginares sto fourno me arni – Artichokes in the oven with lamb
1 leg of lamb chopped by the butcher into pieces, 1 kilo of artichokes, 1 kilo of potatoes, salt & pepper, olive oil, water, oregano.
Peel and clean the artichokes. Get a large roasting tray and place the lamb inside. Now spread out the artichokes in the tray. Clean the potatoes and cut them into thick pieces. Also place the potatoes into the tray. Pour olive oil on to the top and sprinkle with oregano, salt and pepper. Mix everything together with your hands and place into the oven at about 150 degrees. The best way is to cook this dish slowly. Keep checking if there is enough water in the tray. It will help to keep the meat moist and avoids burning it. The cooking time will be around 2-3 hours.
Oven dishes
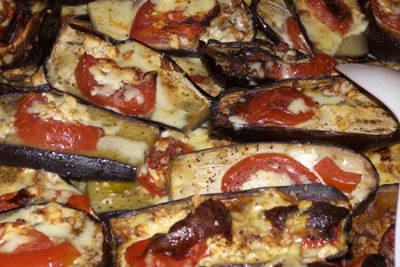
Melitzanes fournou – Eggplant from the oven: Peel the eggplants and cut them in slices of 1 cm. Put them in a baking tin with olive oil. Grate 2 medium tomatoes and chop a spring onion. Divide the tomatoes and the spring onion over the eggplant with some salt and pepper. Sprinkle 100 grams of grated cheese over the mixture (Parmesan or goat cheese). Bake the eggplant in the oven for about 20 minutes at 250 degrees.
Tazine pot: Cut an eggplant in small cubes and grate 3 tomatoes. Chop a spring onion and crush 5 garlic cloves. Fill an oven pot layer for layer with the eggplant, tomatoes, garlic, spring onion, oregano, pepper, salt and feta. Sprinkle 8 tablespoons of olive oil over the mixture in the pot. Put the lid on and bake in the oven for about 30 minutes at 250 degrees.
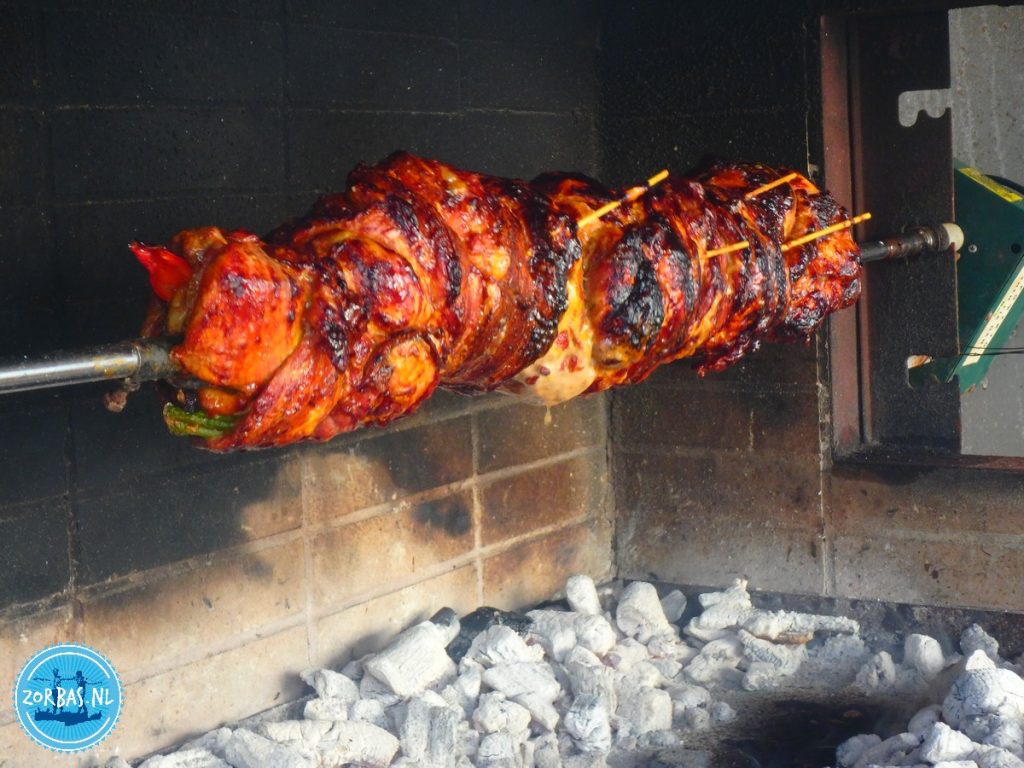
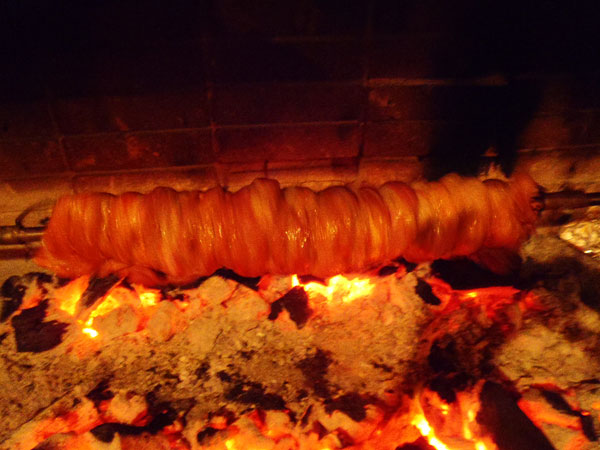
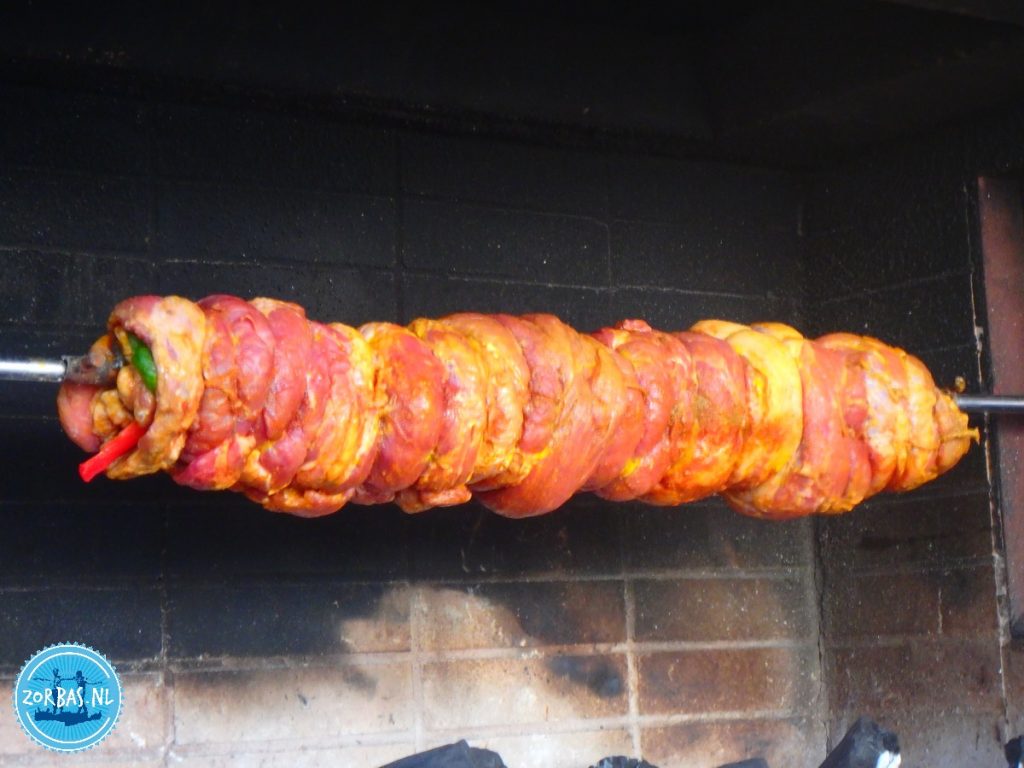
Typical Greek dish on the spit
Kondosouvli: Grease a spit for the grill with olive oil. Stick large pieces of pork filet on the spit while rubbing salt, pepper and mustard on every new piece of pork you add. Wrap the meat around the spit with pieces of rope and pack the meat in aluminum foil after. Let the spit turn for about 1 ½ hour.
Greek soup
Fassolatha – White bean soup: they say that in ancient times fassolatha (white bean soup) was the national dish of Greece and the first recordings of beans were around 6000 BC. The way of cooking the beans has not changed from the ancient times. The beans were thought to be one of the foods that gave men stamina and more ability to produce children. During the fasting period forty days before Easter all kinds of beans are eaten a lot, but also all year round. Greeks often only eat meat a few times in the week. This is why the Cretan diet works so well with all the health benefits. Eating beans two or three times a week can help to stop heart attacks, strokes and heart disease .
Beans are full of nearly all the nutrients that we need to live from and a fantastic source of iron. In ancient history Hippocrates, who was seen as the father of medicine, would tell to people with liver problems to eat fakies (lentils). Fakes (lentils) do have huge amounts of choline in them. They do help the liver to get rid of fats, so it can clean the blood in the body more easily and get rid of harmful toxins. In all Greek households they eat pulses as a main meal, served with village bread, salad and chips or sometimes fish. They are very tasty and filling vegetables. Garlic and olive oil are usually cooked with the pulses, making it even more healthy.
Growing your own lentils
You can try growing your own lentils. All you need to do is buy a bag of dried lentils, place them on some damp cotton wool or a damp napkin in the bottom of a plastic container or small cup. Place them in in a warm place and slowly small roots will break out from the lentils. When they get bigger, you can plant them in compost in a seeding pot and they will grow into plants.
Ingredients
For 6-8 people: 1 kilo of dried white beans (gigantes are good), 10 cups of water, 1/2 cup olive oil, 1 large onion, 2 large carrots, 2 large sticks celery, 1 bay leaf, salt & pepper, a sprig of parsley, 1/2 kilo ripe big tomatoes, 2 large spoons of tomato paste.
Before cooking, put dry beans overnight in a bowl of cold water to soak, so they will re-hydrate. This is very important or you cannot use them. Get a large cooking pan. Drain the beans, place them inside with the olive oil and new water covering the beans. Bring the beans to boil, then simmer for around 1 hour until the beans are tender. Don’t let them go mushy. Next add the vegetables, peeled and chopped into chunks: carrots, chopped tomatoes, chopped celery, parsley, onion, tomato paste and a bay leaf. Simmer it together with the beans for 30-45 minutes until the soup thickens and everything is ready. Season with salt and pepper. Remove the bay leaf and serve with crusty village bread.
Dish with lentils
Fakies – Lentils: Lentil stew for 4-6 people: 1/2 kilo lentils, 1 large onion, 2 gloves garlic, olive oil, tomato puree, 5 large fresh tomatoes, salt & pepper, wine vinegar, 7 cups of water and add as needed.
First peel and chop the onion into small pieces with the garlic. Put the onion and the garlic into a pan with a good covering of olive oil. Fry together for 2 minutes, add the chopped tomatoes, tomato puree, water and the lentils. Bring it all to the boil turn down to simmer. You have to keep an eye on this, because the lentils as they cook will absorb the liquid more and more. So if you see that it is becoming dry, add more water so they do not stick to the bottom of the pan.
You do not want a soup, it’s a stew, so don’t add too much liquid. Towards the end of the cooking time, give a good squeeze of vinegar (count to 3 while squeezing) into the lentils. This adds flavour to the lentils. Add salt and pepper to season. Taste and when the lentils are soft and have turned dark brown, it is ready. It’s nice to serve the lentils with chips, salad, and/or bread.
Horiatiki salata – Greek village salad
To make one standard salad bowl for one person as a meal or shared by four people as part of a meze you need: 4 medium size ripe tomatoes, 1 medium cucumber, green or red peppers or a mixture of each colour, 1 large onion, a handful of black olives, 1 slice of feta cheese 3 cm thick, a sprinkle of oregano (fresh chopped if you have is better), a splash of vinegar, extra virgin olive oil (your own choice of amount), a sprinkle of salt.
Wash all the vegetables and peel the onion, take the top of the peppers and take the seeds out. Take the stem out of the top of the tomato, then cut it in half and into chunky bit size pieces. Place it in salad bowl. Slice the ends off the cucumber and then long ways down the middle, so you have two parts. Chop into chunky rustic pieces and place them also in the salad bowl.
Slice the onion into half rings and put all of it into the salad bowl. Using your hands, gently mix the salad in the bowl together. Chop the peppers into nice rings and place on top of the salad in the bowl, around the top it looks pretty too. Place the square of feta cheese in the centre of the salad, sprinkle with oregano. Place the black olives around the feta cheese. The salad is ready to serve.
How to serve the salad
Never put the dressing on a Greek salad before you take it to the table. A part of the meal is for the salad to be dressed by the person or people who will eat it. An oil and vinegar set are usually in small jugs or glass bottles on the table with salt and pepper. A basket of freshly cut village bread is served with a Greek salad. Many people will dip this into the salad dressing as they get to the bottom of the bowl. The last bits of feta, olive oil and vinegar are soaked up into the bread: very tasty indeed!
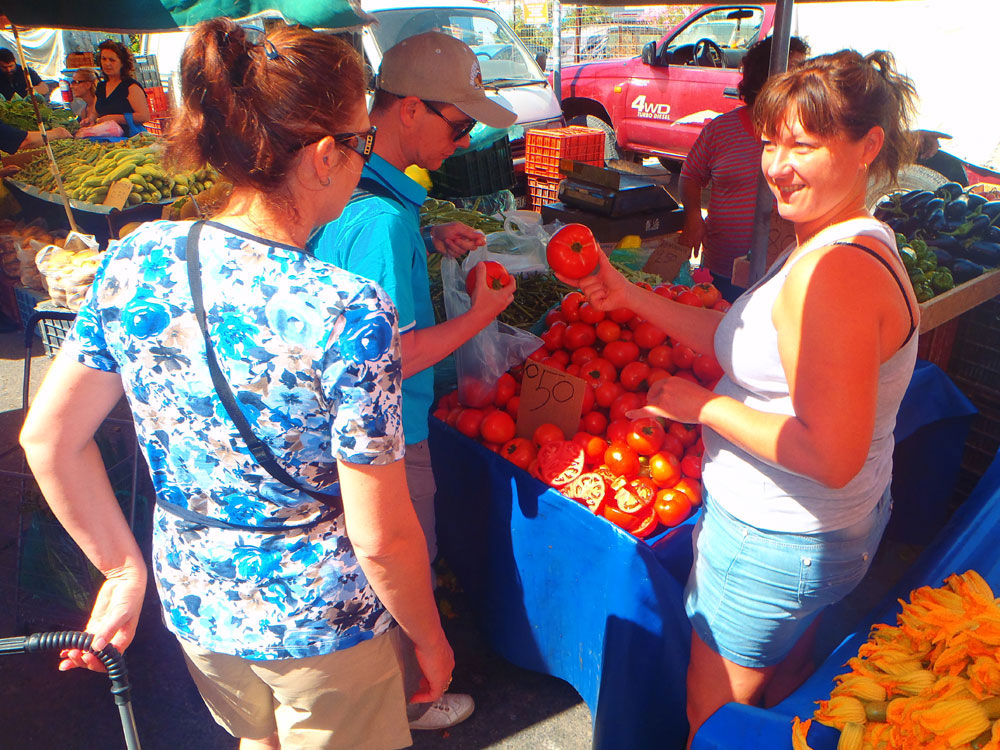
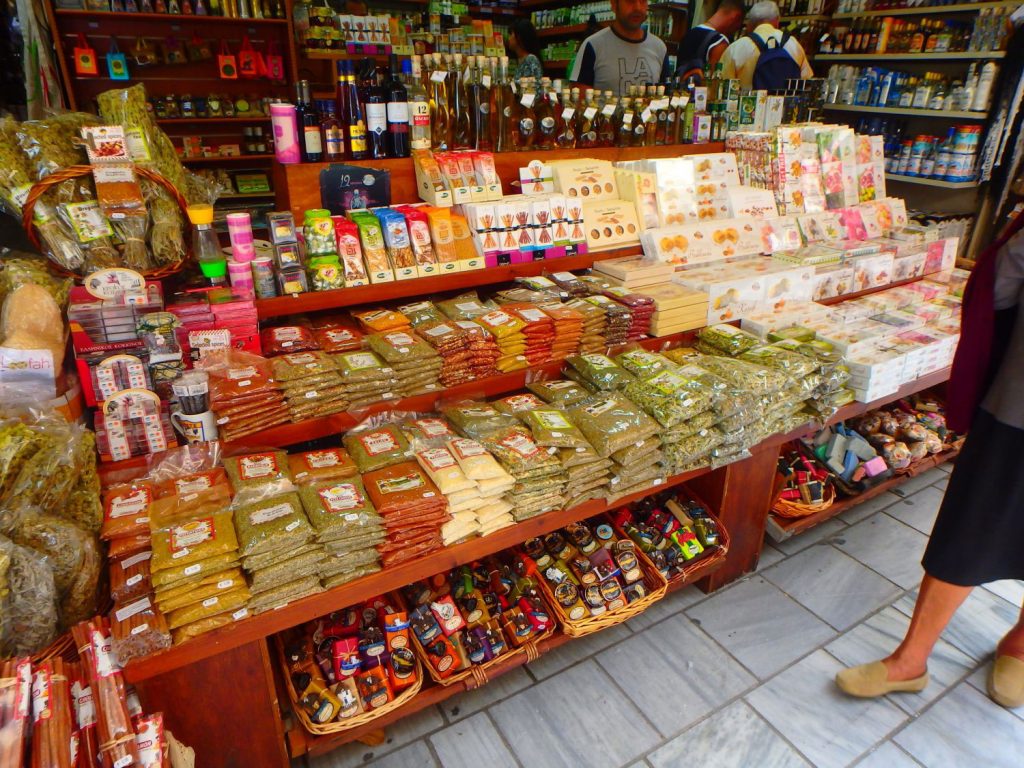
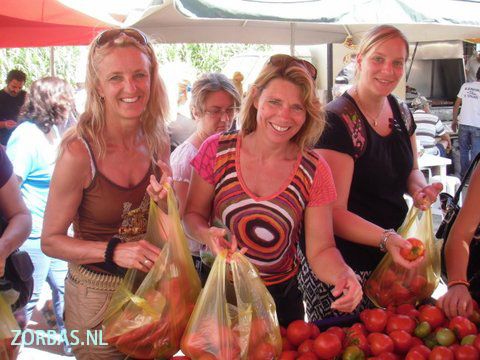
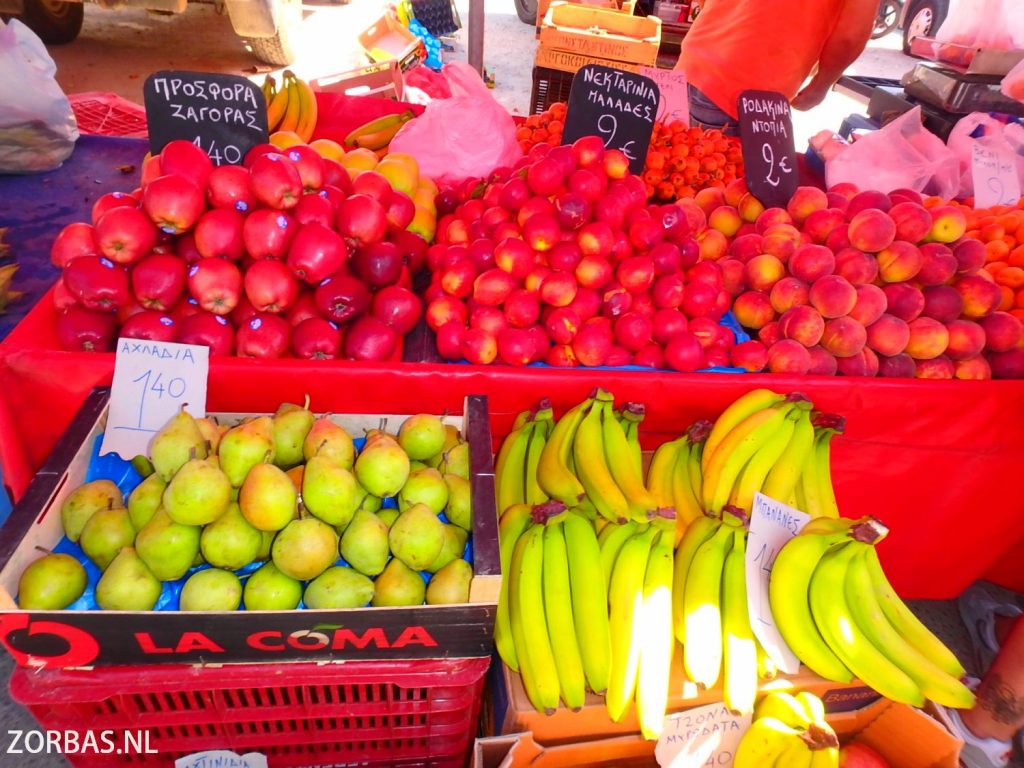
Most Greek traditional taverns will have an organic vegetable garden at the back, so when you order a Greek salad the ingredients are often picked fresh from the garden or have been collected that same day. Many weekly farmers markets are held on the island of Crete, different days for each area. All the fantastic organic vegetables, fruits, pulses, olives, olive oil, breads, wild greens, snails, cheeses, eggs, herbs, flowers and honey are sold in huge amounts to everybody in the area. People travelling in from far away, know this is the very best fresh organic produce you can get. The fresh vegetables and fruits are picked that same morning very early from the fields, orchards and mountains.
Fresh vegetables
I always buy all my vegetables and products from the Heraklion markets, twice a week. The taste when cooking with organic produce is unbeatable and so healthy. A visit to a real Cretan farmers market is a great experience and you will see the real island people. Everybody who goes to the market regularly has to get their own market trolley to put the goods in. We have two silver metal baskets on wheels. I often fill them up three or four times going back and forth to the car. The thing that you notice most at the market is how colourful all the fruits and vegetables are in all shapes and sizes. Whatever happens to be in season sells that week, so it is changing all the time. Much more interesting than a supermarket any day!
Different dishes with horta
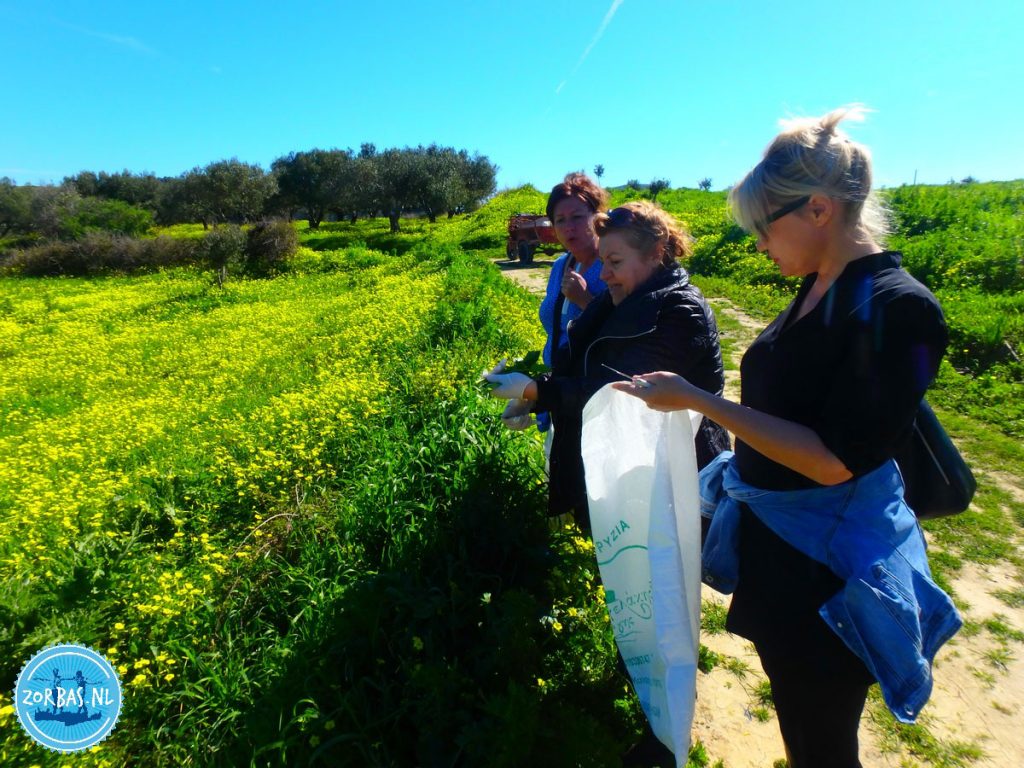
Horta means: “wild greens”. This can be any plant that can be eaten growing wild in the Cretan fields or mountains. In between the months of March, April and May, it is horta picking season. This is because it’s spring and everything is at its best after some rain in the winter months. The new greens are growing before the intense summer heat with fresh shoots and buds and full of vitamins.
The horta picking season is also luckily around the same time that the Greek orthodox Calendar starts lent, when no meat is eaten. Many people are eating horta nearly every day at this time of year. There are many ways that horta can be eaten and prepared. It is though a very time consuming job. Horta is mainly picked by the women. The knowledge of the many plants is passed down the generations and learned what you can and cannot eat.
Wild spinach
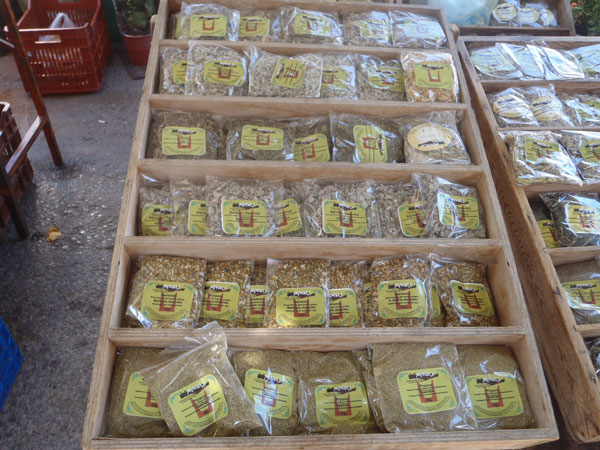
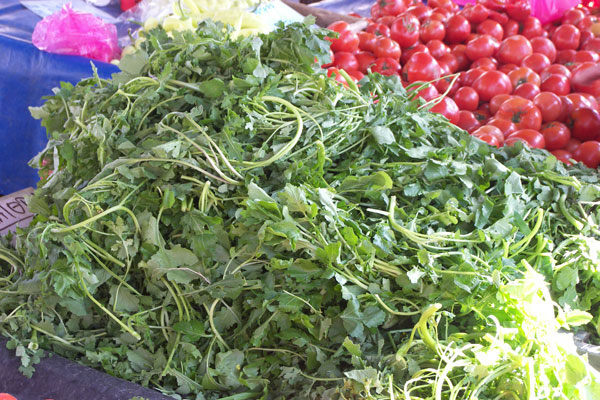
Wild spinach (vleta) is a plant with a long stalk and very dark green leaves, sold at the markets in huge bundles tied together with string. Vroeves, the marigold plant, that when mature has bright yellow flowers, is only picked when young with new leaves and the flowers are never eaten. Chicory, stamagathi, askolibri, radikia, mandrilides are names of some of the most well-known hortas, but there are many more! Wild garlic is also found and wild leek and spring onions in some areas. Parsley, dill and coriander are picked and used to make hortopitas: “wild green pies”.
The horta is growing wild in mountains and fields around the Cretan villages and in the olive groves. Village people all pick horta on their own fields. Salads are made from wild horta, dandelion, milk thistle and wild rocket. I found a lot of wild rocket when walking in the mountains. The taste was very sweet but at the same time peppery. To an experienced eye the mountain fields are a buffet of food, waiting to be picked. People living in the towns and cities also like very much to eat the horta. It is sold at all of the farmers markets, picked fresh and brought down from the mountains and villages. Everyone knows how good it is too eat.
Collecting horta
Family and friends will often go together for a few hours to collect the horta in the fields. They take a small knife with them to cut it, putting everything into bags. The horta must be sorted and cleaned before it can be cooked. Everything will be tipped out on to a big table or into a huge plastic bowl and the work begins! Herbs such as dill, parsley, spring onions or leek are set aside for pies. Each piece of plant must be looked at to see if there are no bugs, dead leaves, soil, stones, flowers or buds, grass or weeds that got picked by mistake. The horta is placed into a separate very large plastic bowl. This can take hours of work, if you are picking horta for a whole family to eat for a few days.
When cooking, the horta shrinks down like spinach, so you really need a lot. After sorting, it needs to be washed a least 3 or 4 times. When you are changing the water, you will see the water getting cleaner each time. The horta is now ready to work with. Horta can be blanched in a pan of boiling water for 30 seconds, drained and left to cool. Then the horta is put into bags and frozen, so it is available all year round to eat. All taverns serve horta, it can be used in many ways and the different horta dishes are part of a meze.
Horta vrasta – Wild greens boiled
Boil a pan of water add salt and put the horta in. Boil until soft, drain and serve covered with olive oil, fresh squeezed lemon and salt. This is a simple, but very tasty dish.
Omeleta me horta – Omelette with wild greens
For 4 people, 4 eggs, wild greens, salt & pepper, olive oil, feta cheese.
You must boil the horta in water and drain before making the omelette. Beat the eggs in a bowl. Get a non-stick frying pan and cover it with olive oil. Heat the olive oil and add 2 big hand full of the horta. Fry the horta turning over in the pan, until the colour goes a little dark. Next, crumble a square of feta cheese over the horta. Keep everything moving in the pan. Add the beaten eggs and make sure an even amount is poured all over the mixture.
Now cook the omelette. When the sides start to come up get a pan lid bigger than the frying pan and place on top. Flip the omelette over onto the pan lid and back on the other side to cook in the frying pan. The omelette should be golden brown. Serve the omelette alone or with a salad and village bread or as part of a meze.
Hortopita – Pie with wild greens
Horta, a sprig of dill, a sprig of parsley, spring onions, leek, spinach, 4 cups of self-raising flour, salt & pepper, olive oil, water, feta cheese (optional).
The horta must be boiled and drained. Mix the horta with the spring onion, parsley, dill, coriander or wild leek. If you use feta cheese, it can be crumbled into the mixture at this point for the filling. Make the pastry for the pies: put the flour into a bowl and add olive oil and water. Mix it together to make a dough. If it is to dry, add a little more water. When it is in a soft ball, use a rolling pin and on a floured surface, to roll the dough into a round shape of about 1 cm thick. Get a coffee cup and use the cup to cut circles in the pastry for each pie.
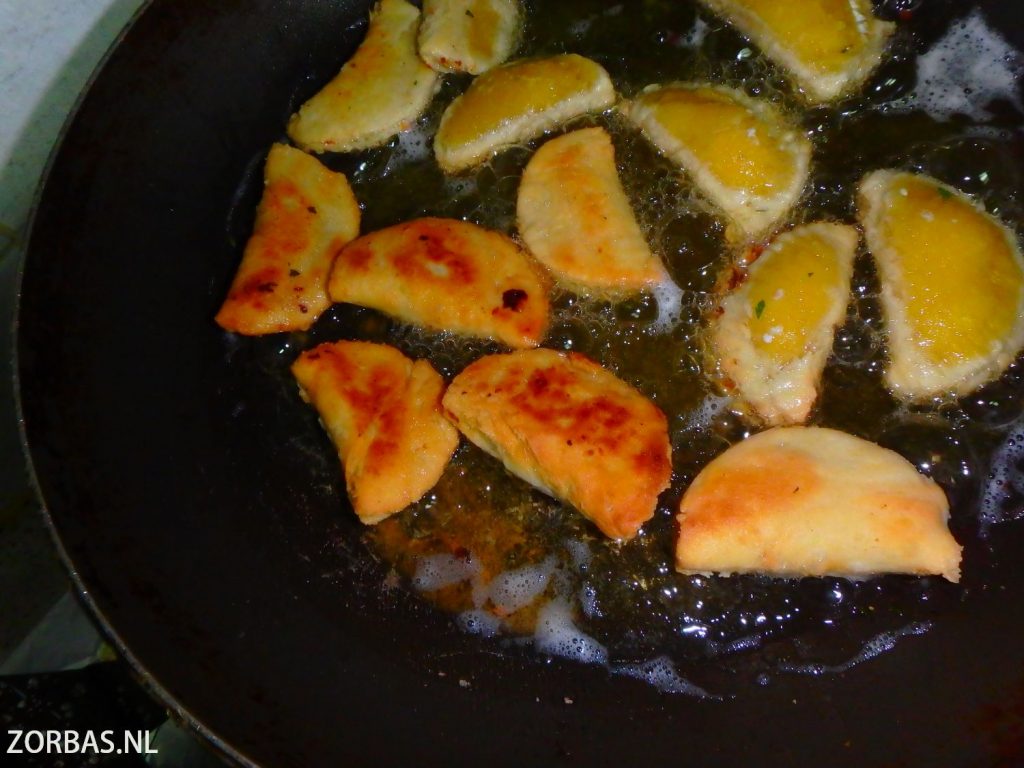
Place a a small amount of horta in the centre. Fold the pie over and seal it. Press with a fork to close the pie and make a nice pattern around the edges. When each pie is made, it is now ready to be gently fried in olive oil in a shallow pan until golden brown. Turn the pies over to fry each side. The pies can also be served cold. Enjoy your homemade horta pies!

Mediterranean potato salad
Crete produces some of the best organic potatoes of all the Greek islands, due the perfect climate in the farming areas. One of the most well known areas for producing potatoes is Lassithi and its amazing Plateau. Rich soil and flat land make potatoes from Lassithi the best to cook with and known all over Crete. For the potato salad you need 4 large potatoes, parsley 2 bundles, salami 2 standard packs, mayonnaise (good quality), salt & pepper, black olives (without stones) 2 hands full, gherkins.
Peel and chop the potatoes into bite size pieces, but not small. You want to have rustic chunky salad, boil a pan of water and add salt when its ready add the potatoes,boil until soft pay attention not to over cook or the texture will be too soft like puree. Place a colander in the sink and drain the potatoes. Let cold water run over them until cold. Chop the salami and gherkins into chunky pieces.
Next wash and clean the parsley and chop it. Put all the ingredients into a mixing bowl and a add the mayonnaise as much as you prefer. Season with salt and pepper. Place the Mediterranean potato salad into a serving dish, since it is now ready to go. The good thing about this dish is that for a vegetarian option just leave the salami out. Perfect for parties in winter and BBQ in the summer.
Honeycomb Greek yogurt with fruit compote
Ingredients: 500 gr full fat Greek yogurt, 8 table spoons Greek honey, 4 table spoons sugar, 1 – 2 tea spoons baking soda, 0.5 L glucose syrup, 0.5 L water, fruits (for example apricots, strawberry, peach, just select what you like).
First make the honey comb: Melt the sugar in a small pan with the water and then add the glucose syrup and honey. Let it all melt together until it starts to change colour to a golden brown. You must be careful not to let it burn. Add 1 spoon of the baking soda first and mix in well. A reaction will take place: the honey comb will become thick and make a strange bubbling texture. If this is not happening, add the second spoon of soda. Place the honey comb mixture onto a non-stick flat baking tray. Put into the fridge to set and get cold.
The fruit compote: Wash the fruit and take any stones, cores or stalks away from the fruit. Cut the fruit into medium size bits and cook in a small pan with some sugar. You decide how sweet you want it, taste for yourself. Add a little water and cook until soft. Make the fruit smooth using a blender. After this, pour the fruit through a strainer to have a smooth sauce/compote.
The Greek yogurt: Place the Greek yogurt in a mixing bowl. Take the honey comb from the fridge. It must be completely chilled. Break the honey comb into chunky bits and mix into the Greek yogurt. Spoon into serving glasses and pour the fruit compote over the top. It is also nice to sprinkle lavender flower seeds on top of this lovely desert.
Cretan olive oil
Olive oil from Crete: On Crete, the farmers still harvest their olives manually by using traditional methods. The pressing of the olives is done according to strict rules to ensure that the final product, the olive oil, is of impeccable quality. On this website you can read more about the olive oil from Crete.
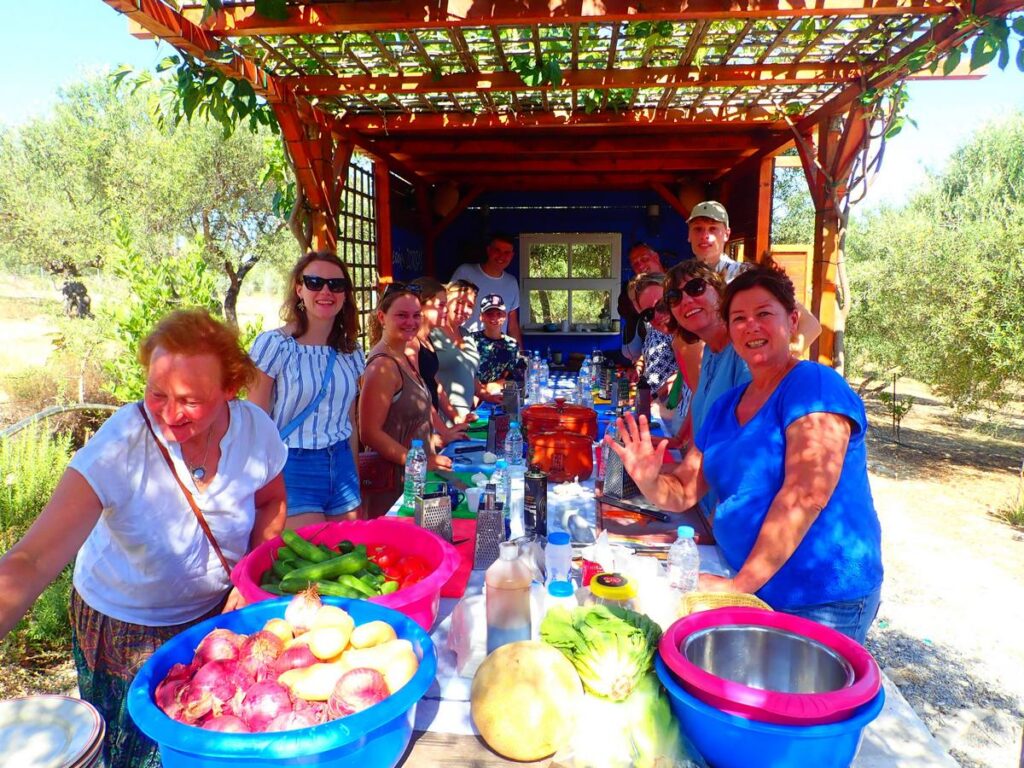
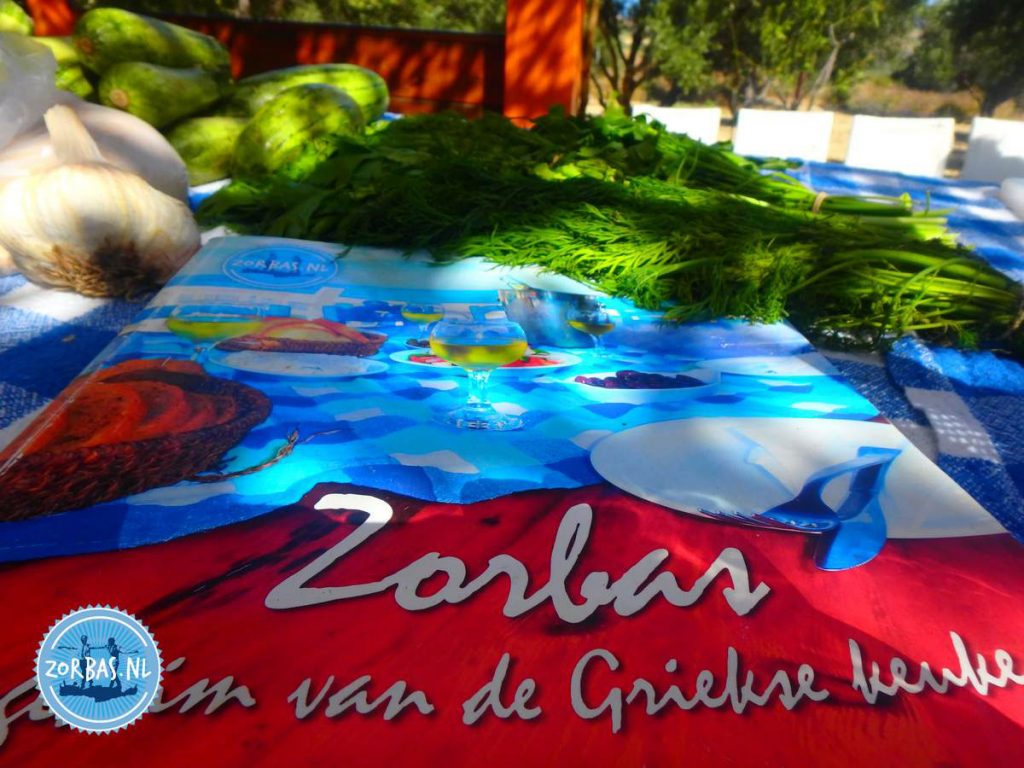
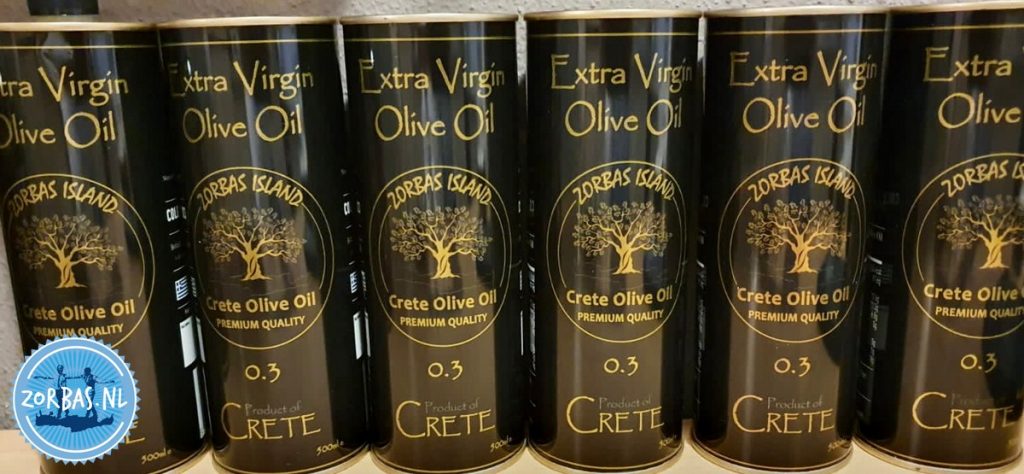
Photo book cooking lessons in Greece: Pictures about workshop Greek cooking on Crete from 15 years Greek cooking school on Crete.
Crete News: On this page, we give updates of all our activities in Crete. We upload our weblogs during summer and winter.
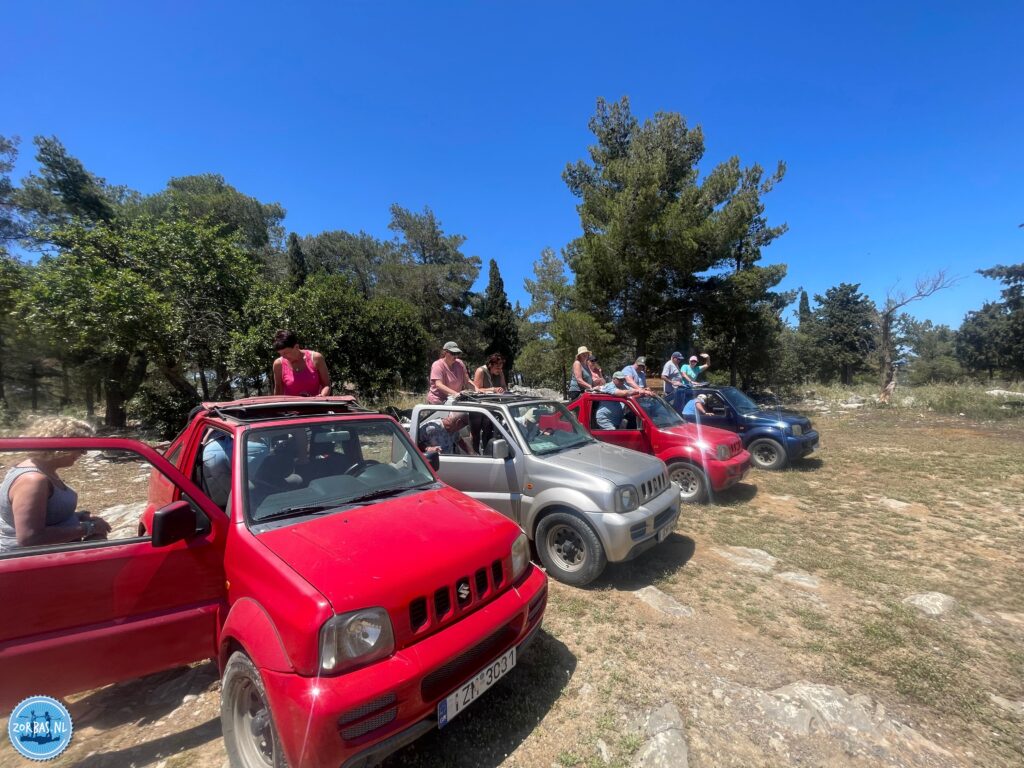
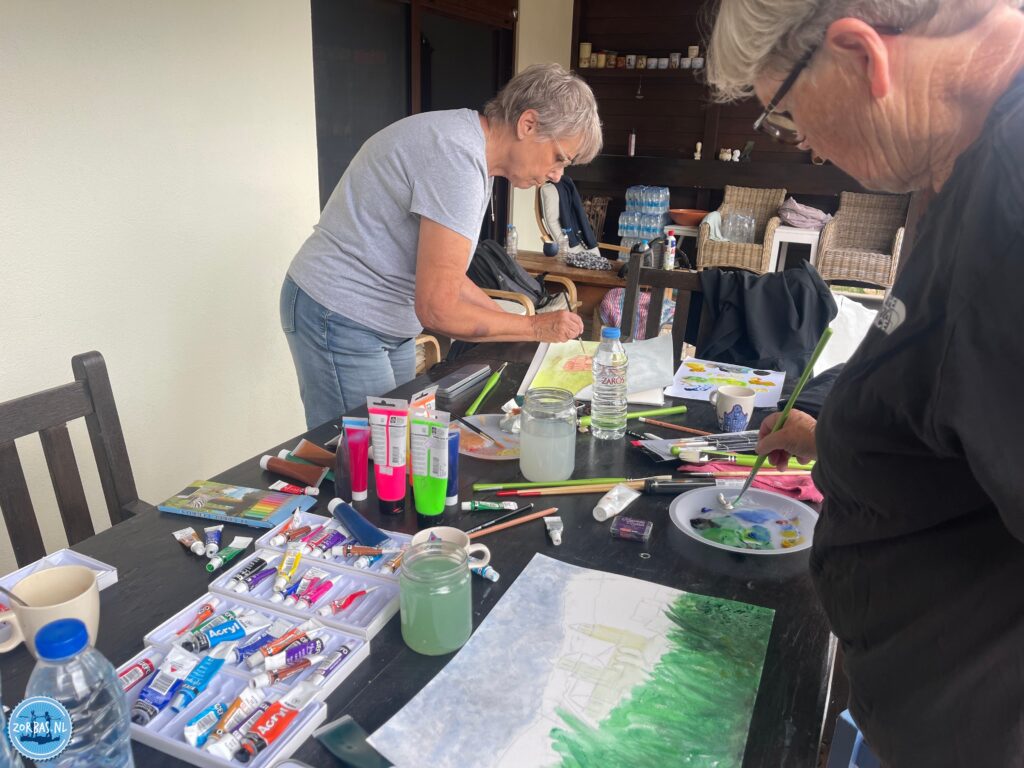
Excursions on Crete: Here you find a lot of information about excursions during your holiday on Crete like: car and bike rental, car and accommodation, diving, cycling, hiking, hiking combinations on Crete, Greek cooking lesson, playing golf, boat trips, horseback riding, outdoor activities, sailing, jeep safari, fishing, group excursions, weekly excursion programs or fly-drive.
Holiday information
Pleasant cooling from the Meltemi
Although the mercury is rising to around 31°C, conditions on Zorbas Island remain very comfortable. The Meltemi—a well-known, gentle wind from the Aegean Sea—is providing a delightful and constant cooling breeze this week.
ZorbasIsland #KokkiniHani #CreteWeather #Meltemi #GreeceHoliday


Zorbas Island 2026 Crete Greece Newsletter: your holiday in Crete in 2026 – The new Zorbas Island programme: dear holidaymaker, we are delighted to present the first details of our brand new programme for 2026! At Zorbas Island, everything revolves around an unforgettable holiday on beautiful Crete.
Holiday Crete 2026 agenda – Agenda Zorbas Island, Crete – Season 2026: our new agenda is ready with the excursions for 2026, including many new excursions. You are probably curious about the activities we will be organising at Zorbas in the coming year, and this agenda provides an overview of all the activities that will interest you.
Holiday information Crete Zorbas Island: Apartment rentals and accommodation on Crete for most of the year. The right place for family apartments and holiday homes, all your excursions and cheap flights to Crete. A comprehensive overview of the latest holiday news from Crete, including lots of photos. Crete is the southernmost holiday island in Europe.
To give you an impression about your holiday at Zorbas Island on Crete, we created a short “Zorbas Island” Movie for you: If you got 5 minutes for holidays to Crete.
More information
Greek cookbook of Zorbas on Crete
📱 WhatsApp: +30 697 6788022 📧 E-Mail: Zorbasisland@gmail.com